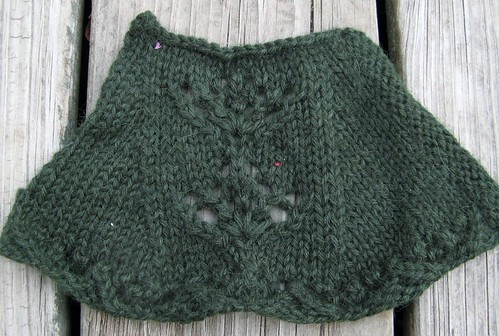
I think tomorrow just might be the day for Flywheel to go live on Ravelry!
In the meantime, I’ve made a second video demonstrating some stitches from the Flywheel Swatch Clue. I am so sorry about the length, and the middling video quality. Perhaps you can agree to be entertained when I talk to myself?
I’m almost ready to publish the Swatch Clue for Flywheel! I’m getting really excited about this M-KAL. I’ve had four knitters test-knit the entire pattern in “clue by clue” format — they have all finished, and their work is spectacular!
In preparation for swatching, I wanted to talk about some different ways to make a 1/1RC. This stitch shows up in several clues for this shawl, and I came up with five different methods, including one introduced to me by test knitter Mary B. I made a video, but I’ll also write a short description of each variation below.
Here’s the stitch definition I use for the stitch in question:
1/1 RC: Slp 1 st to CN and hold to back of work; k1, then k1 from CN.
In essence, you are working the next two stitches out of order, with the 2nd stitch on the left needle crossing in front of the 1st stitch on the left needle.
Method #1: Use a Cable Needle
In this method, you follow the stitch definition literally — you get your cable needle and do exactly, precisely what the stitch definition says. The only problem? It’s super awkward to use a cable needle with just one stitch (at least it is for me).
Method #2: Cable Without a Cable Needle
There are lots of tutorials on how to cable without a cable needle in general. (I like Grumperina’s picture tutorial.) To make a 1/1RC without a cable needle, follow these steps:
1. Hold yarn to front, slip 1 st from left to right.
2. Knit 1 st.
3. From the back, insert left needle into JUST the slipped stitch.
4. Pinch both stitches, to prevent unraveling — pull the right needle out of both stitches, and insert it through JUST the worked stitch.
5. Knit 1 st (the previously-slipped stitch).
Method #3: Work Out of Order
I would say this is my go-to method for working 2-st cables in general. There’s no slipped back and forth, so you don’t have to worry about dropped stitches or whether the yarn should be in front or back. It doesn’t work for bigger cables, but for this it’s just fine! It does involve a little finagling to get your needle into each stitch, so pointy needles are your friend. It goes something like this:
1. Knit the 2nd stitch on the left needle (leave both stitches on the needle for now.)
2. Knit the 1st stitch on the left needle.
3. Slide both stitches off the left needle.
Method #4: Twist
This is the only method that results in a slightly different topology. Because the right-most stitch is worked twice, it is a little more bulky. It looks *almost* the same, but not quite, and because of that it’s not my favorite. But, it totally works, and in some situations that’s just fine. Swatch and find out if you share my opinion (or not!). Thusly:
1. K2tog, but leave both stitches on the needle for now.
2. Knit the 1st stitch on the left needle.
3. Slide both stitches off the left needle.
Method #5: Swap
This is the new-to-me method, and I love it! So clever. Thanks again to Mary for bringing it to my attention. It works like this:
1. Slip 2 sts together, as if to k2tog.
2. Return both sts to left needle, in their new orientation.
There’s a question I get asked on a regular basis … it has several forms, but in essence it is this: knitter wants to make one of my patterns, which calls for certain weight yarn. They want to use a different weight of yarn. How many yards will they need?
This turns out to be a more complicated question to answer than you might think!
Let’s get concrete here, and take a specific shawl as an example — say, Levade. The pattern-as-written calls for 450-500 yards of fingering-weight yarn. Like many lace shawls, the pattern suggests a needle size (#7) that is several sizes up from what is listed on the yarn label. This is intentional — the goal is to create an open, airy fabric that blocks and drapes beautifully.
Using a Thicker Yarn
Jane Knitter doesn’t have enough fingering-weight yarn in her stash to make this shawl, but she does have some DK and worsted-weight yarn in large enough quantities to make the shawl … or does she? If she uses a #7 needle with a thicker yarn, the fabric won’t have the right characteristics. The thicker the yarn she substitutes, the more firm and dense the fabric will be. If she tries to make the shawl with a #7 needle and 500 yards of worsted-weight yarn, she won’t run out of yarn … but she may create a “shawl” that is much more stiff than she wanted. Try it with a bulky yarn and the shawl may stand up all by itself!
The solution to the too-thick fabric problem is to use a needle that is appropriate for the yarn she has — for DK, I’d go up to a #9, and for worsted-weight, a #10 or even higher. She’ll need to swatch, too, to make sure she likes the fabric she’s getting. Once she’s settled with a needle, she has a new problem … if she makes the shawl as written with a larger needle and thicker yarn, the shawl will be bigger (perhaps MUCH bigger) than the original — and it will use a lot more yarn. There’s no simple way to calculate how much, though a swatch and very accurate scale can help her get an estimate.
If she doesn’t want a bigger shawl, she’ll need to modify the pattern — do fewer rows, somehow. This will use less yarn than making as written … though how much less is (again) difficult to know in advance.
Using a Thinner Yarn
Jack Knitter, on the other hand, has piles of laceweight in his stash — more than he knows what to do with. He’d like to make Levade with some laceweight instead of fingering weight yarn. The good news is, he can probably get away with using laceweight and #7 needles — the resulting fabric will be ephemeral and gauzy, but the shawl will be about the same size as the original and use about the same amount of yarn.
Jack swatches like a good little knitter, but finds he doesn’t like the fabric he’s getting on #7 needles with his laceweight. He has to go down to a #4 before he’s happy. What does this mean for his shawl? If he works the pattern as written with #4’s, he’ll get a tiny little shawl and use up less yarn. This isn’t what he’s going for! The solution is to add rows (often there’s a good place to repeat a portion of a pattern) until it’s the size he wants. Again, the amount of yarn he’ll need is highly variable at this point.
So What Is A Knitter To Do?
If you don’t have the weight yarn that’s called for in a pattern, don’t despair … but don’t expect an easy answer, either! You’ll need to swatch and do some math and maybe alter a pattern to get results you’ll be happy with. Tame that knitting, make it yours!
People are making Winter Beach! This makes me ridiculously happy. I wrote up some swatching directions to help knitters succeed. In addition to the customary stockinette gauge swatch, I give directions for a shaping/lace swatch, to practice the techniques used in the pattern. In particular, the “m5-3b” stitch (found at the base of each flower) is new to many. Whenever possible, I try to practice any totally new stitch on a swatch, instead of risking my garment.
I made a quick video for m5-3b (aka, make 5 stitches, 3 rows below), and today’s blog post includes a step-by-step picture tutorial. Learn whichever way suits you best!
And now, for your tips-and-tricks pleasure, the photo tutorial for m5-3b!
Stitch definition for m5-3b:Make 5 sts by (k1, yo, k1, yo, k1) in stitch 3 rows below first stitch on left-hand needle (after m5 is complete, drop stitch off left-hand needle, allowing three rows to ladder down to m5 row)
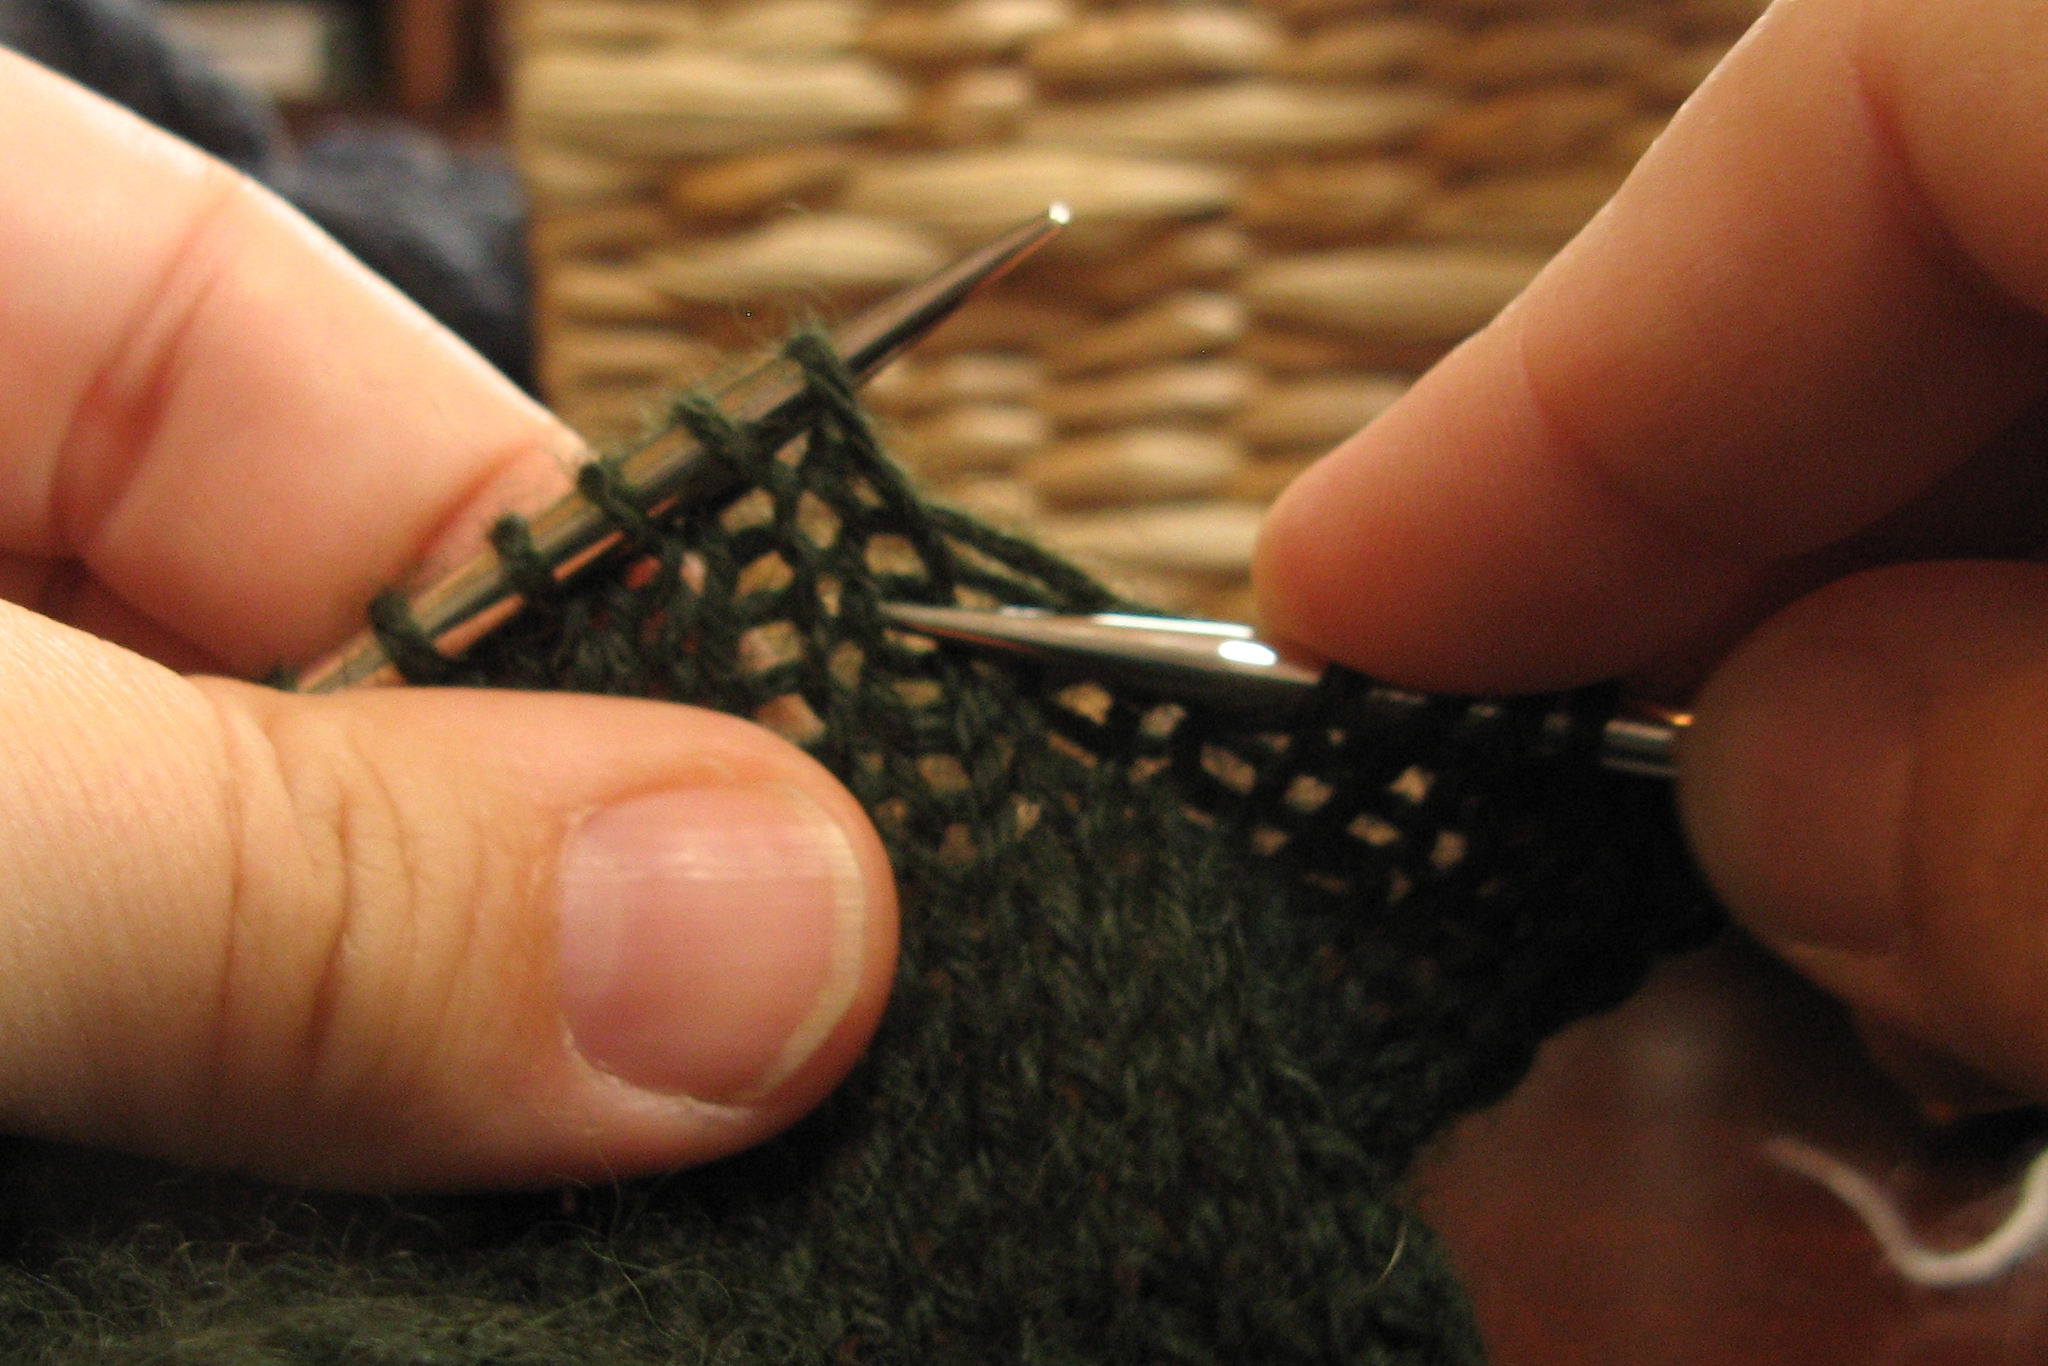
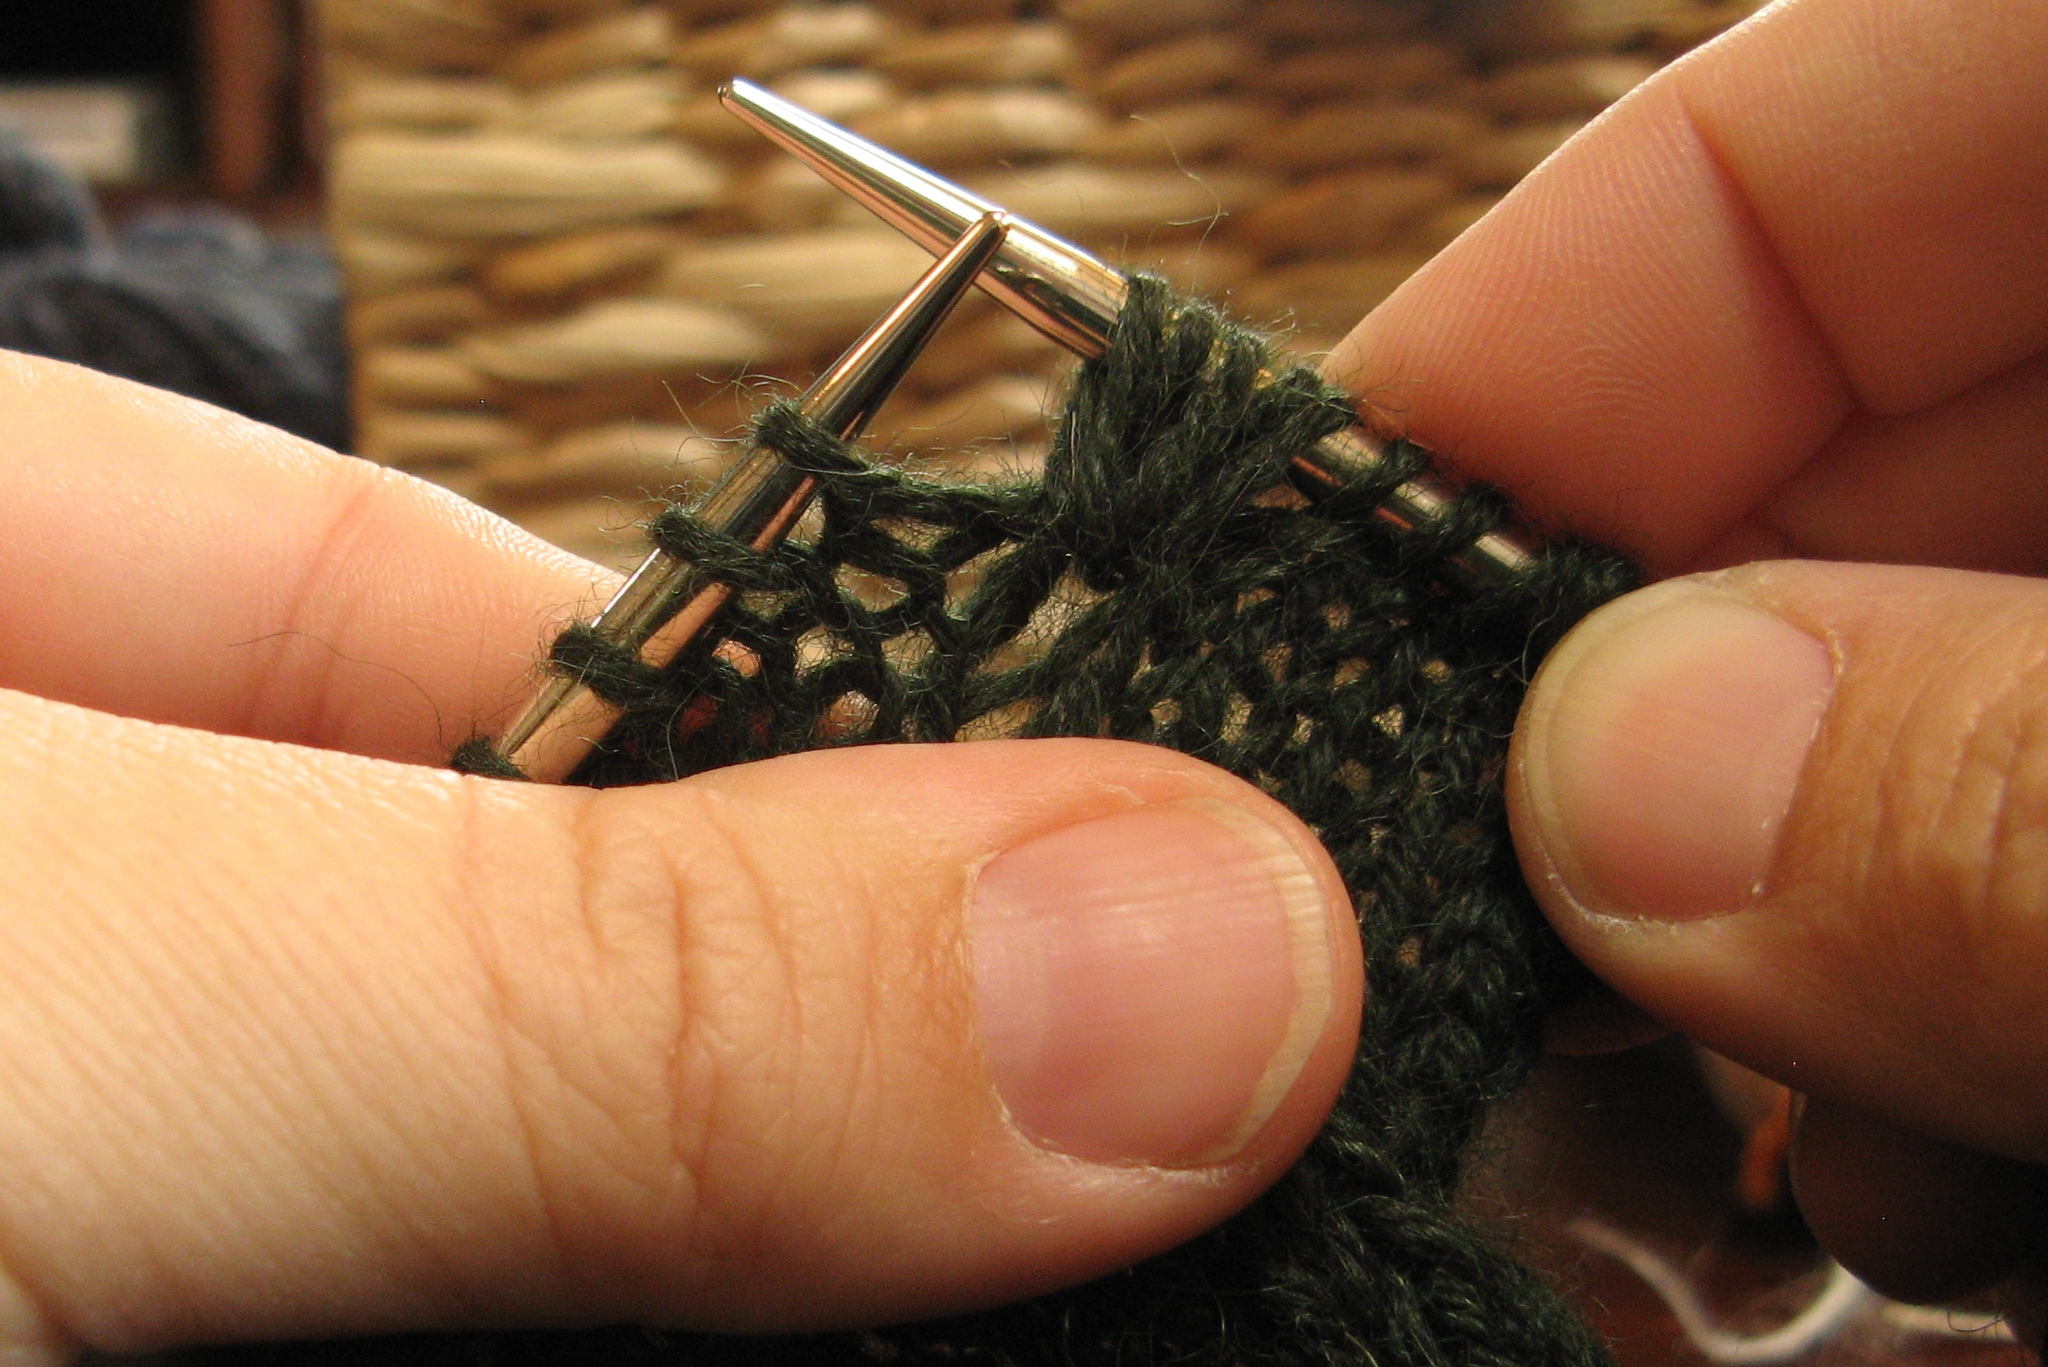
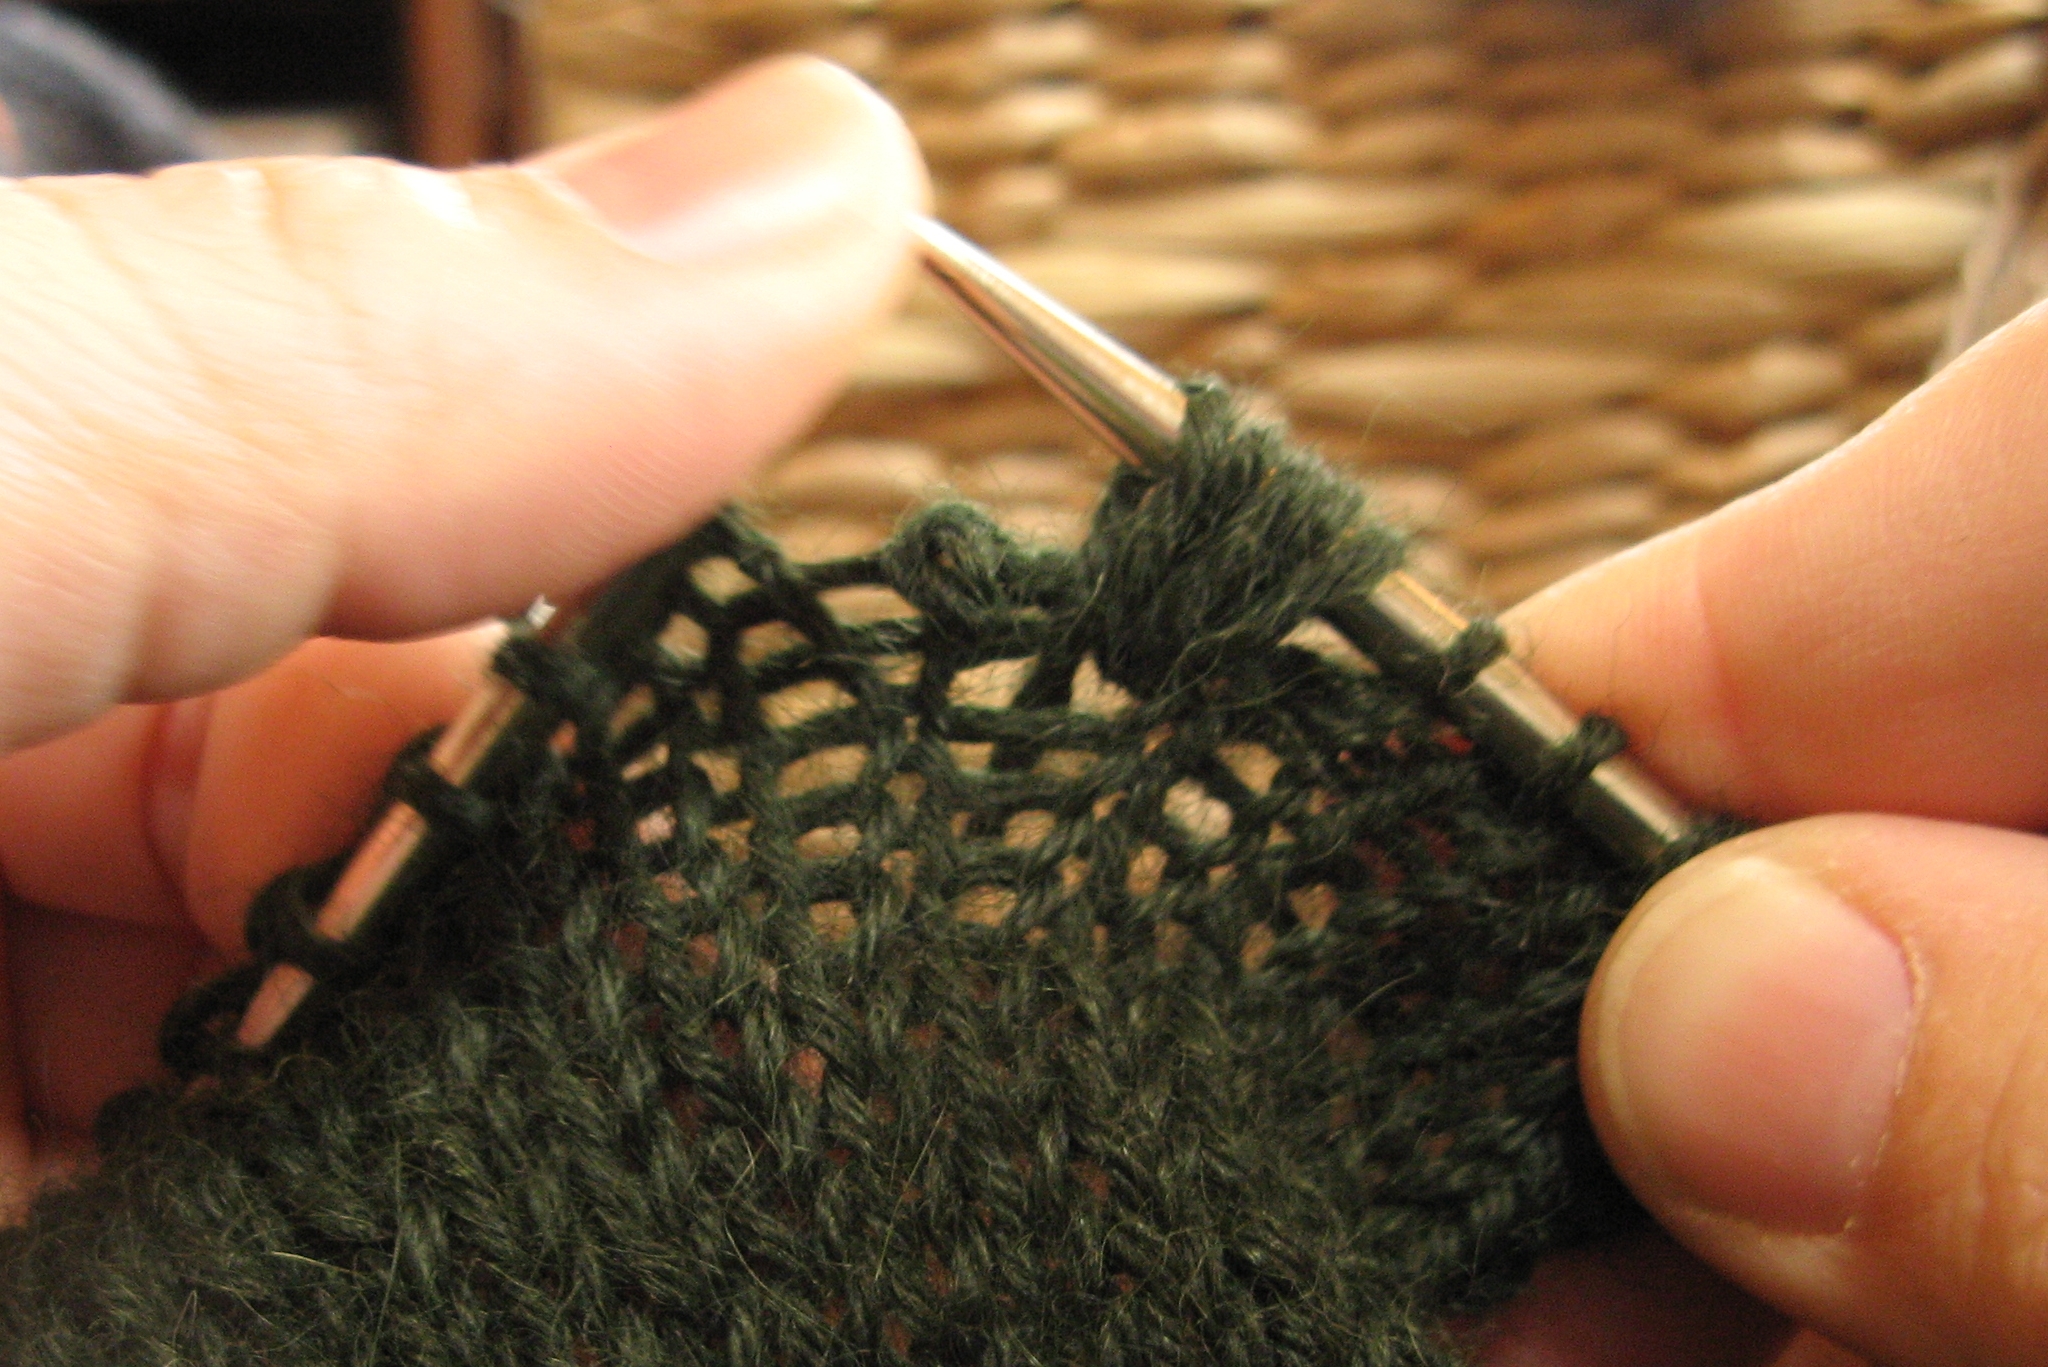
Step#1: Identify the target stitch, into which we will be working. The first stitch on the left needle is “zero” — count down 1, 2, 3 holes. In this photo, the right needle is beginning to enter the target stitch.
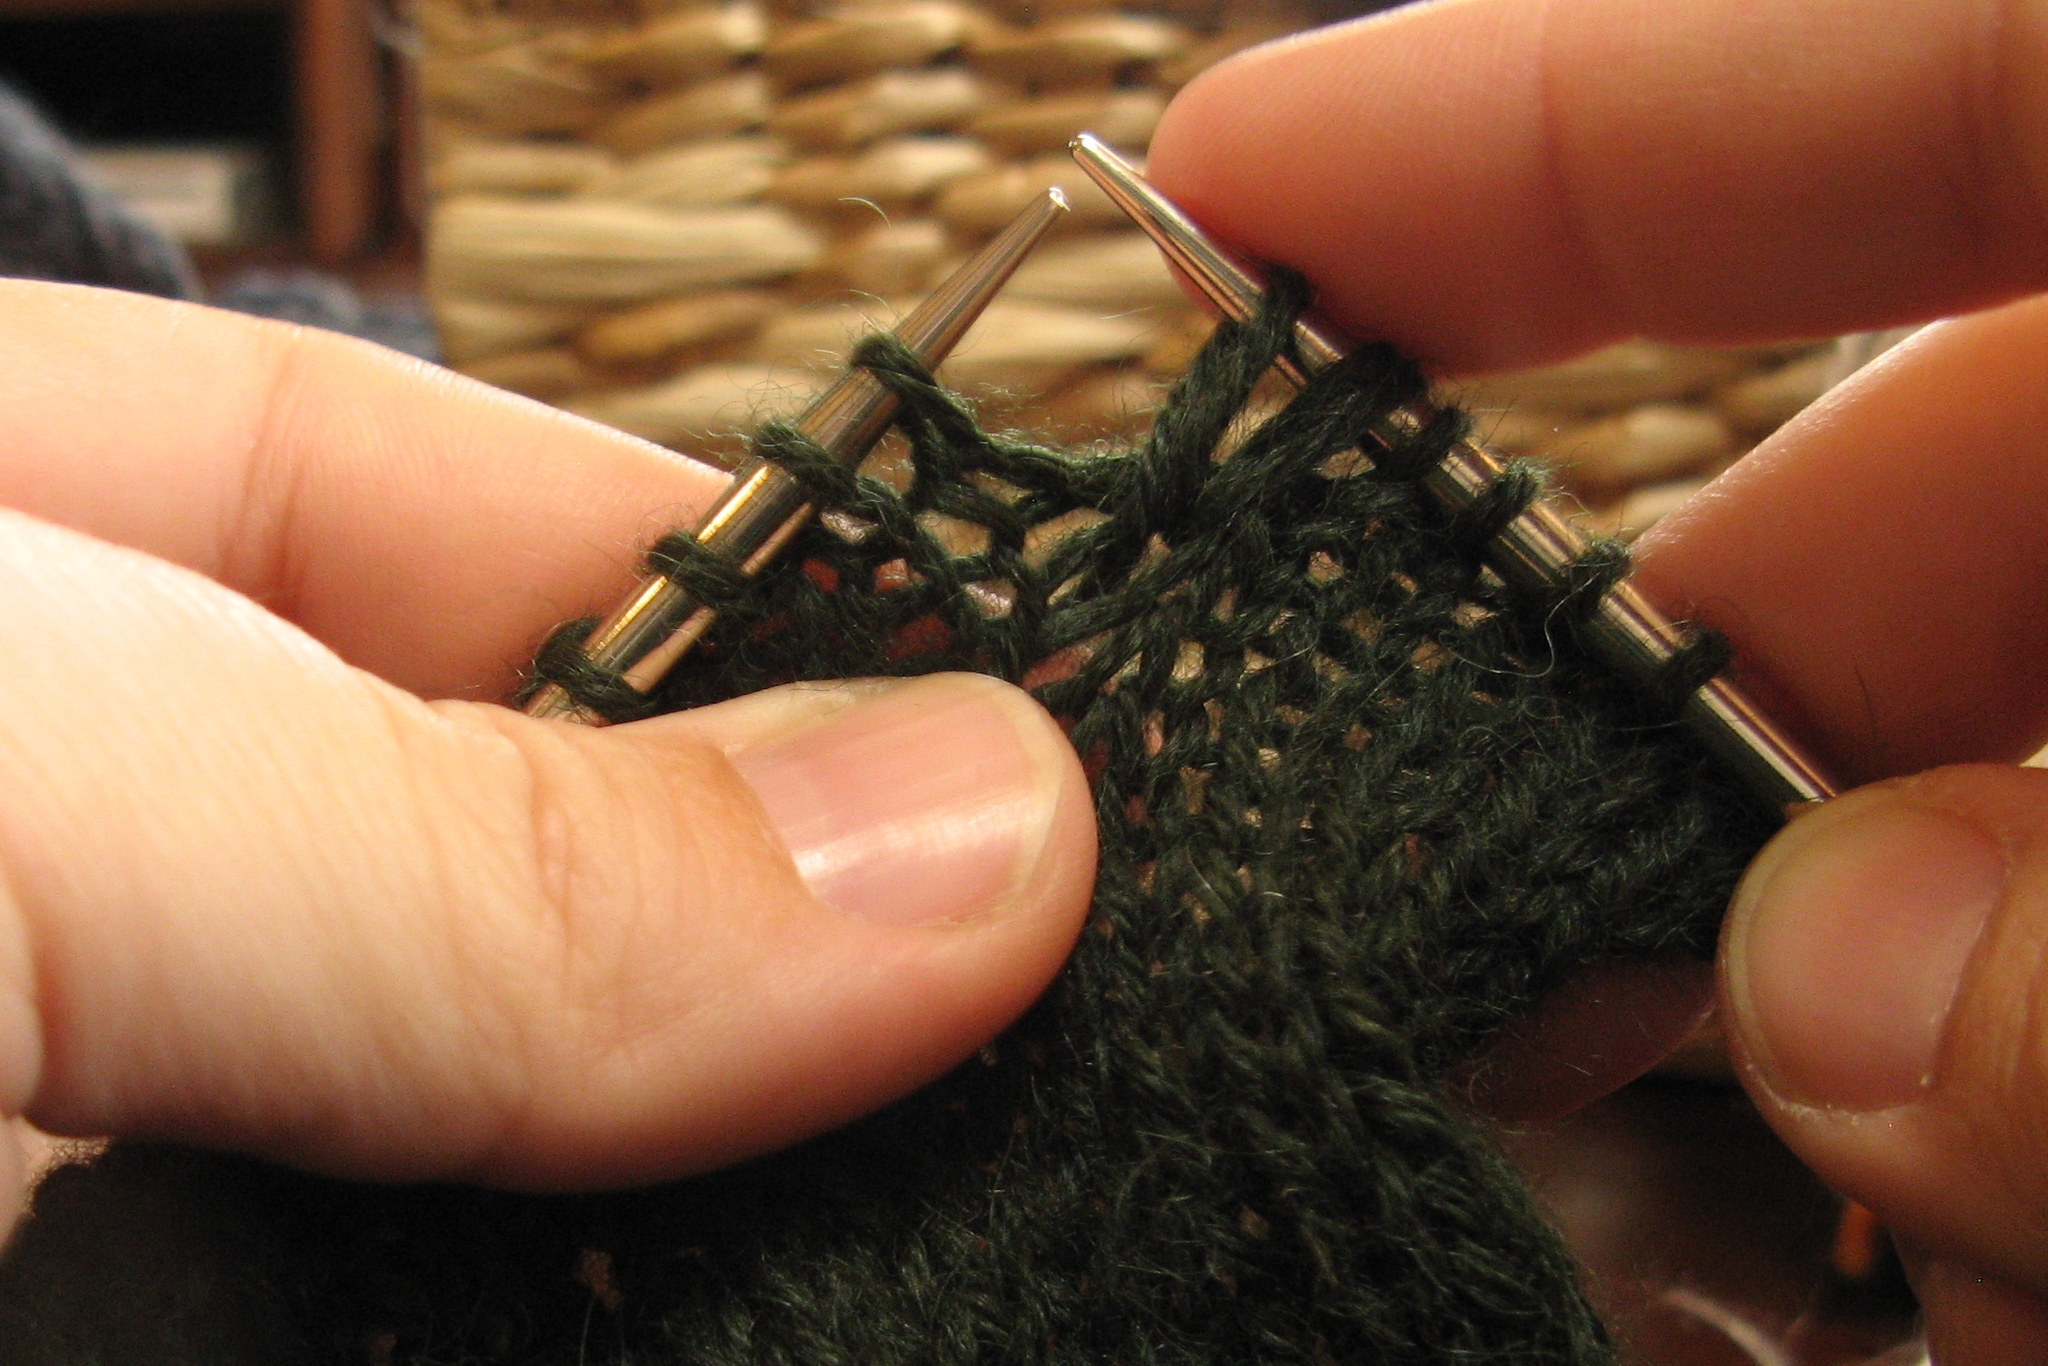
Step #2: Knit 1 through the target stitch
Step #3: Yarn over
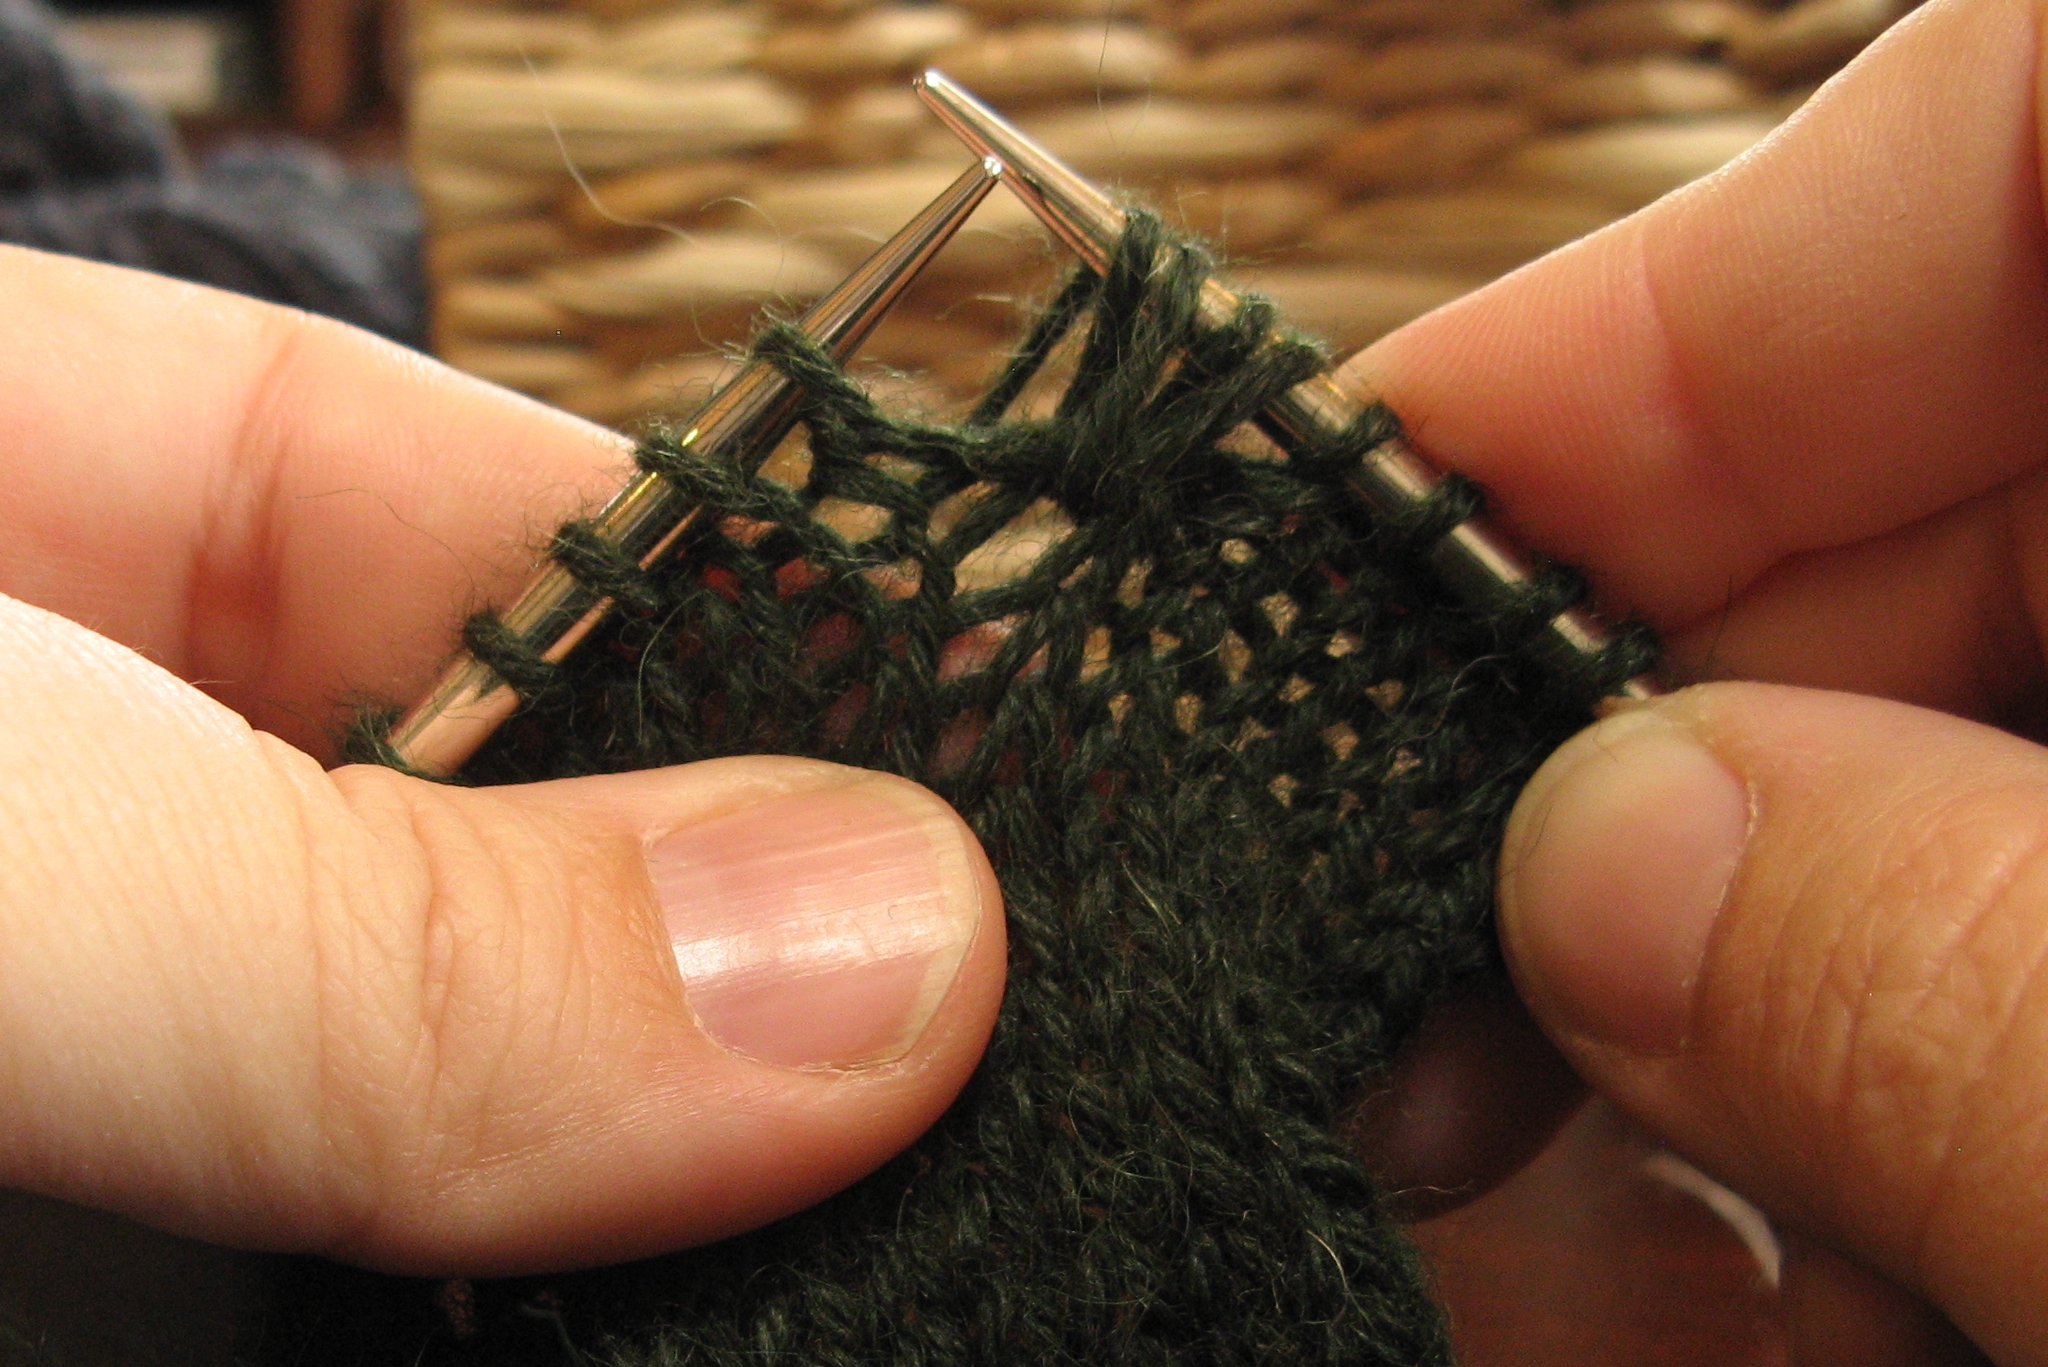
Step #4: Knit 1, then yarn over
Step #5: Knit 1 (this is the fifth and final stitch made)
Step #6: Drop the first stitch off the left needle — allow 3 rows to ladder down (they are secured within the (k1, yo, k1, yo, k1)
Dear reader … how do you manage your shopping at big yarn festivals and fairs? Inquiring minds want to know!
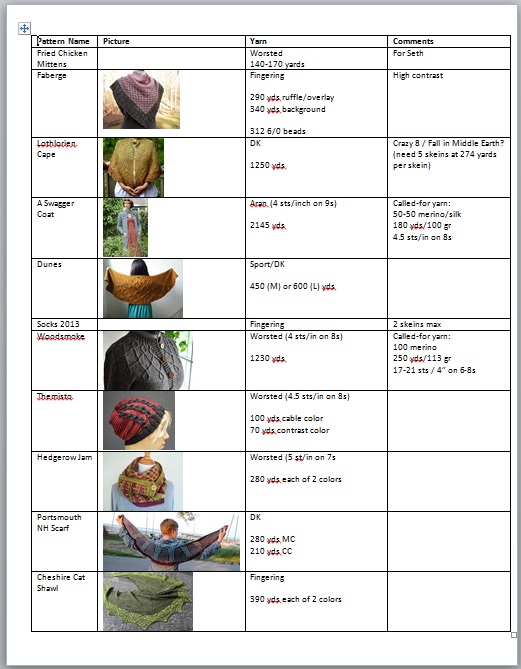
At both the New England Fiber Festival and Stitches East, I armed myself for efficient shopping my own specially-formatted list of projects for which I would permit myself to buy yarn. Although I was chuffed with myself for being a brutally deliberate buyer-of-yarn, I didn’t think the list itself was anything particularly special.
Well, color me wrong! Yet again. I showed the list to people, hoping to get congratulatory pats on the back. Heck, I’m only buying yarn for projects I might actually someday make! But, they were more interested in the list itself. For each pattern, I have a picture to remind me what it looks like (stolen from Ravelry and shrunk to 1″ high), info about the yarn required (mostly weight and yardage, plus any other details), and room for comments.
Here’s my list for NEFF:
Don’t you love how I’m permitting myself to speculate in sock yarn, but only up to two skeins worth?
I bought yarn for some of these projects at NEFF, so my list for Stitches East has some repeats and some new items:
You can download my knitting shopping list as Word doc, pre-formatted for your knit-shopping pleasure. I’ve even put in specs for several Remily Knits patterns. You know, just in case.
I recently had a brainstorm … you know the kind. I wondered, was it possible to knit, say, a three-layered scarf, with all three layers worked at the same time — no seams or anything else — so that I could use a slow-color-change yarn with different-width layers and have the colors change at the same rate? Well, I had a vision of circular needles flopping and changing, and I made it work!
I’m releasing “Eye of The Storm” any minute now on Ravelry — watch this space for an official announcement on Friday. In the meantime, here’s a quick video and photo tutorial of how it works:
These photos show the scarf in progress…
#1 — Ready to knit the wrong side of the long leg — outbound from the center spine. Note that the needle tips match — the same circ is used to work the outbound legs, always.
#2 — A view of the back of the work — the long leg is next up to be worked, the middle leg is hanging off the back of the scarf, and the short leg has just been worked.
#3 — At the end of the outbound leg, drop the circ you just freed up …
#4 — …. turn the work ….
#5 — …. and pick up the far end of the other circ.
#6 — Work the right side of the long leg — inbound towards the center spine. Notice that the needle tips do NOT match — on inbound legs you always use two different circs.
#7 — When you finish the inbound leg, push the stitches for the short leg (now the “hanging off the back” leg) onto the cable of that circ.
#8 — Push the stitches for the middle leg (the next leg to be worked) up onto the tip of the circ. Ready for the next leg!
One of my upcoming patterns is the Full Bloom Bag — a cute little colorwork bag that packs a lot of knitting technique into a single project. The body of the bag is worked in the round using stranded colorwork to make the stripes and roses. The body is then steeked and the beginning and end are grafted so that the stripes go vertically on the finished bag. The bottom is worked in the round from picked-up stitches, and the top edges are finished with applied i-cord, which is then extended into i-cord handles.
I made a lining with pockets, because it seemed like the right thing to do:
The Method to my Madness:
The bag dimensions are 6″x6″x3″. I decided to use a half-inch seam in all cases, to make the math easier. I used a single fat quarter for the lining, and less than half a yard of heavy-duty interfacing. The
For the bottom, I cut a 4″x7″ piece of fabric and a 3″x6″ piece of interfacing. For the body, I cut a 14″x19″ piece of fabric, a 6″x18″ piece of interfacing (for the body itself), and a 3″x18″ piece of interfacing (for the pocket).
I would have preferred fusible interfacing, but I also wanted the sturdiest interfacing I could get, so I had to settle for non-fusible and sew it in myself. For the bottom, I just centered the interfacing on the fabric, then stitched all the way around the edge. For the body, I placed the two pieces as shown below, and stitched them in place.
I pressed a half-inch hem along the top edge. Next, I folded up the pocket. First I pressed from this side, so that the interfacing was just in the fold:
Then I flipped it over and pressed it so that the raw edge exactly met the fold:
Here you can see all three layers:
I sewed a hem along the top edge to keep it in place. Next, I sewed vertical seams at the corners — measuring from the right, the seams are at 3.5″, 9.5″, and 12.5″:
I seamed the body first, then set in the bottom:
The finished lining, which I hand-sewed into the bag (whip-stitched just under the i-cord edging):
Back in February, I cast on for my very own Rodekool de Kool. Designer Nancy Marchant published Rodekool in the Deep Fall 2010 issue of Knitty — it’s still available (for free!) there. Keeping in mind that I’ve never done much (any?) brioche before tackling this “extraspicy” pattern, and also keeping in mind that this pattern involves not only brioche but also lace … it totally kicked my butt at first.
Getting through the set up rows and first few repeats of the lacy brioche pattern very nearly did me in. It took every last ounce of available mental prowess, kntterly skill, and concentration. Thankfully, once I’d accomplished those first few rows … things began to settle in. Here’s the RS and WS just after the keyhole:
So pretty, right? For once I used the called-for yarn, and (by accident) selected the same colorway as the sample, so if my version looks a bit like the photographs in the pattern, that’s why.
I’ve trucked right along on this project, but I find I can’t work on it at knitting group (chatting!) — at least not successfully. But, working on it at knitting group did help me learn how to tink lace brioche! Ugh. I have also learned how to fix (small) mistakes, and also pick up the stitches after ripping out several rows.
I’m nearly done with my Rodekool de Kool, and I wanted to share how I’ve been doing it. I’m not saying it’s totally right (though I believe it is) — naturally this is my interpretation of the pattern, and not endorsed by the designer or knitty, and so on. Usual caveats apply! In editing I already noticed that I keep calling the big decrease a “quintuple” decrease when I should have say “quadruple.” Oops. But, I also feel like I figured out a bit of a shortcut with the wrong-side rows — of course for all I know, brioche knitters already know my little trick, but just in case, I thought I’d share.
With all that, I’m sure you are dying to see what I’ve come up with. I split the video into three parts. First up: Row 1 (RS, MC)
Still with me? Here’s Row 1 (RS, CC):
The part that’s “mine” is next. Row 2 is just straight-up brioche — no lace — and fairly early on I decided it must be possible to work the stitches in a single pass, rather than doing first the MC, then the CC. Here’s my take on Row 2 (WS, MC & CC together):
I hope this was enjoyable and even useful! This is a great pattern with a lot to offer.
In the not-to-distant future, I’ll be releasing a new pattern via Knit Picks IDP. The Mhara Baby Blanket features a cool wave embellishment that is worked as you go. Here is a little “sneak peek” of the pattern, in the form of a video tutorial for how to work the CURVE8 embellishment stitch.
Recently, I finished a pretty pink scarf (see my FO Friday post on the Pinky Pink Rose Ruffled Scarf). The pattern included directions for a very pretty knitted rose, along with directions to “Sew rose onto a round piece of felt using whipstitch and attach pin back or small stitch holder.” There was a clear photo of the finished look of the back of the pin, but having never done this before … I was a tad intimidated. I sought council with my friend Susie, who has made many (many!) beautiful jewelry pieces using beads, precious metal clay, et al. She gave me some great advice, and I set out to Jo-Anns to see if I could find what I needed.
Success! At first I thought of using one of the stitch holders I found in the knitting section, but they were all too long for my rose. In the jewelry-making area I found the perfect size of pin, and it even had loops (for charms) that I could use to secure it to the rose in a non-slip manner. I also bought some neutral-colored felt, and dug up some heavy-duty interfacing to help support the weight of the rose, and cut both into circles (felt slightly larger than interfacing). Quilting thread and a sturdy needle round out my list of materials and tools.
First, I marked pencil lines on the interfacing where I wanted holes to admit the pin:
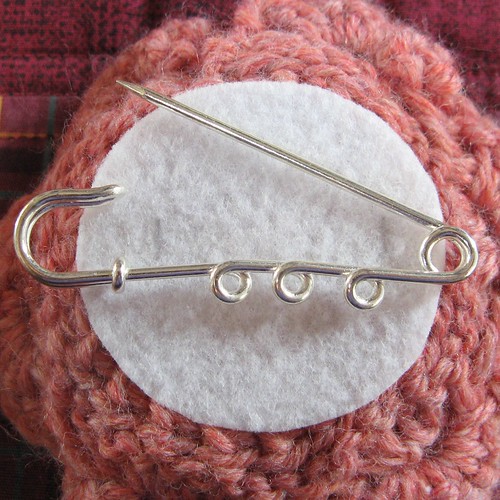
Then, I cut the holes and threaded the pin through:
I secured the pin to the rose with many messy loops of thread:
Then, I hid the mess under the interfacing — poof!
I tacked down the interfacing to further stabilize everything:
Next, I cut holes in the felt, and threaded it onto the pin:
I whip-stitched around the edge of the felt to hold it in place: