Tips and Tricks: Winter Beach’s m5-3b

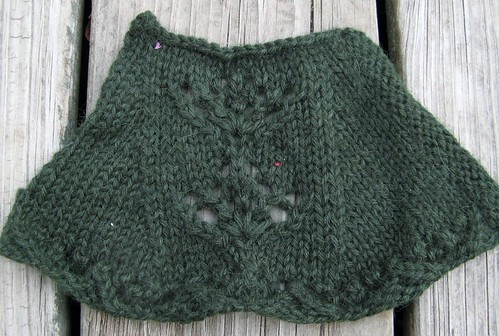
People are making Winter Beach! This makes me ridiculously happy. I wrote up some swatching directions to help knitters succeed.  In addition to the customary stockinette gauge swatch, I give directions for a shaping/lace swatch, to practice the techniques used in the pattern.  In particular, the “m5-3b” stitch (found at the base of each flower) is new to many.  Whenever possible, I try to practice any totally new stitch on a swatch, instead of risking my garment.

I made a quick video for m5-3b (aka, make 5 stitches, 3 rows below), and today’s blog post includes a step-by-step picture tutorial.  Learn whichever way suits you best!

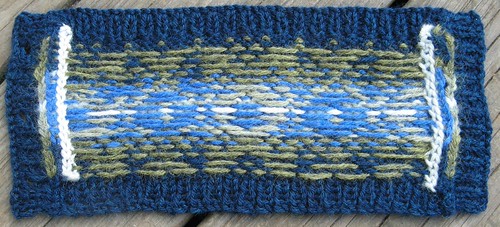
Here’s the practice swatch, first in Kenzie and then in Inca Alpaca.

IMG_7286

IMG_7285

The quick tutorial video:

And now, for your tips-and-tricks pleasure, the photo tutorial for m5-3b!

Stitch definition for m5-3b:  Make 5 sts by (k1, yo, k1, yo, k1) in stitch 3 rows below first stitch on left-hand needle (after m5 is complete, drop stitch off left-hand needle, allowing three rows to ladder down to m5 row)

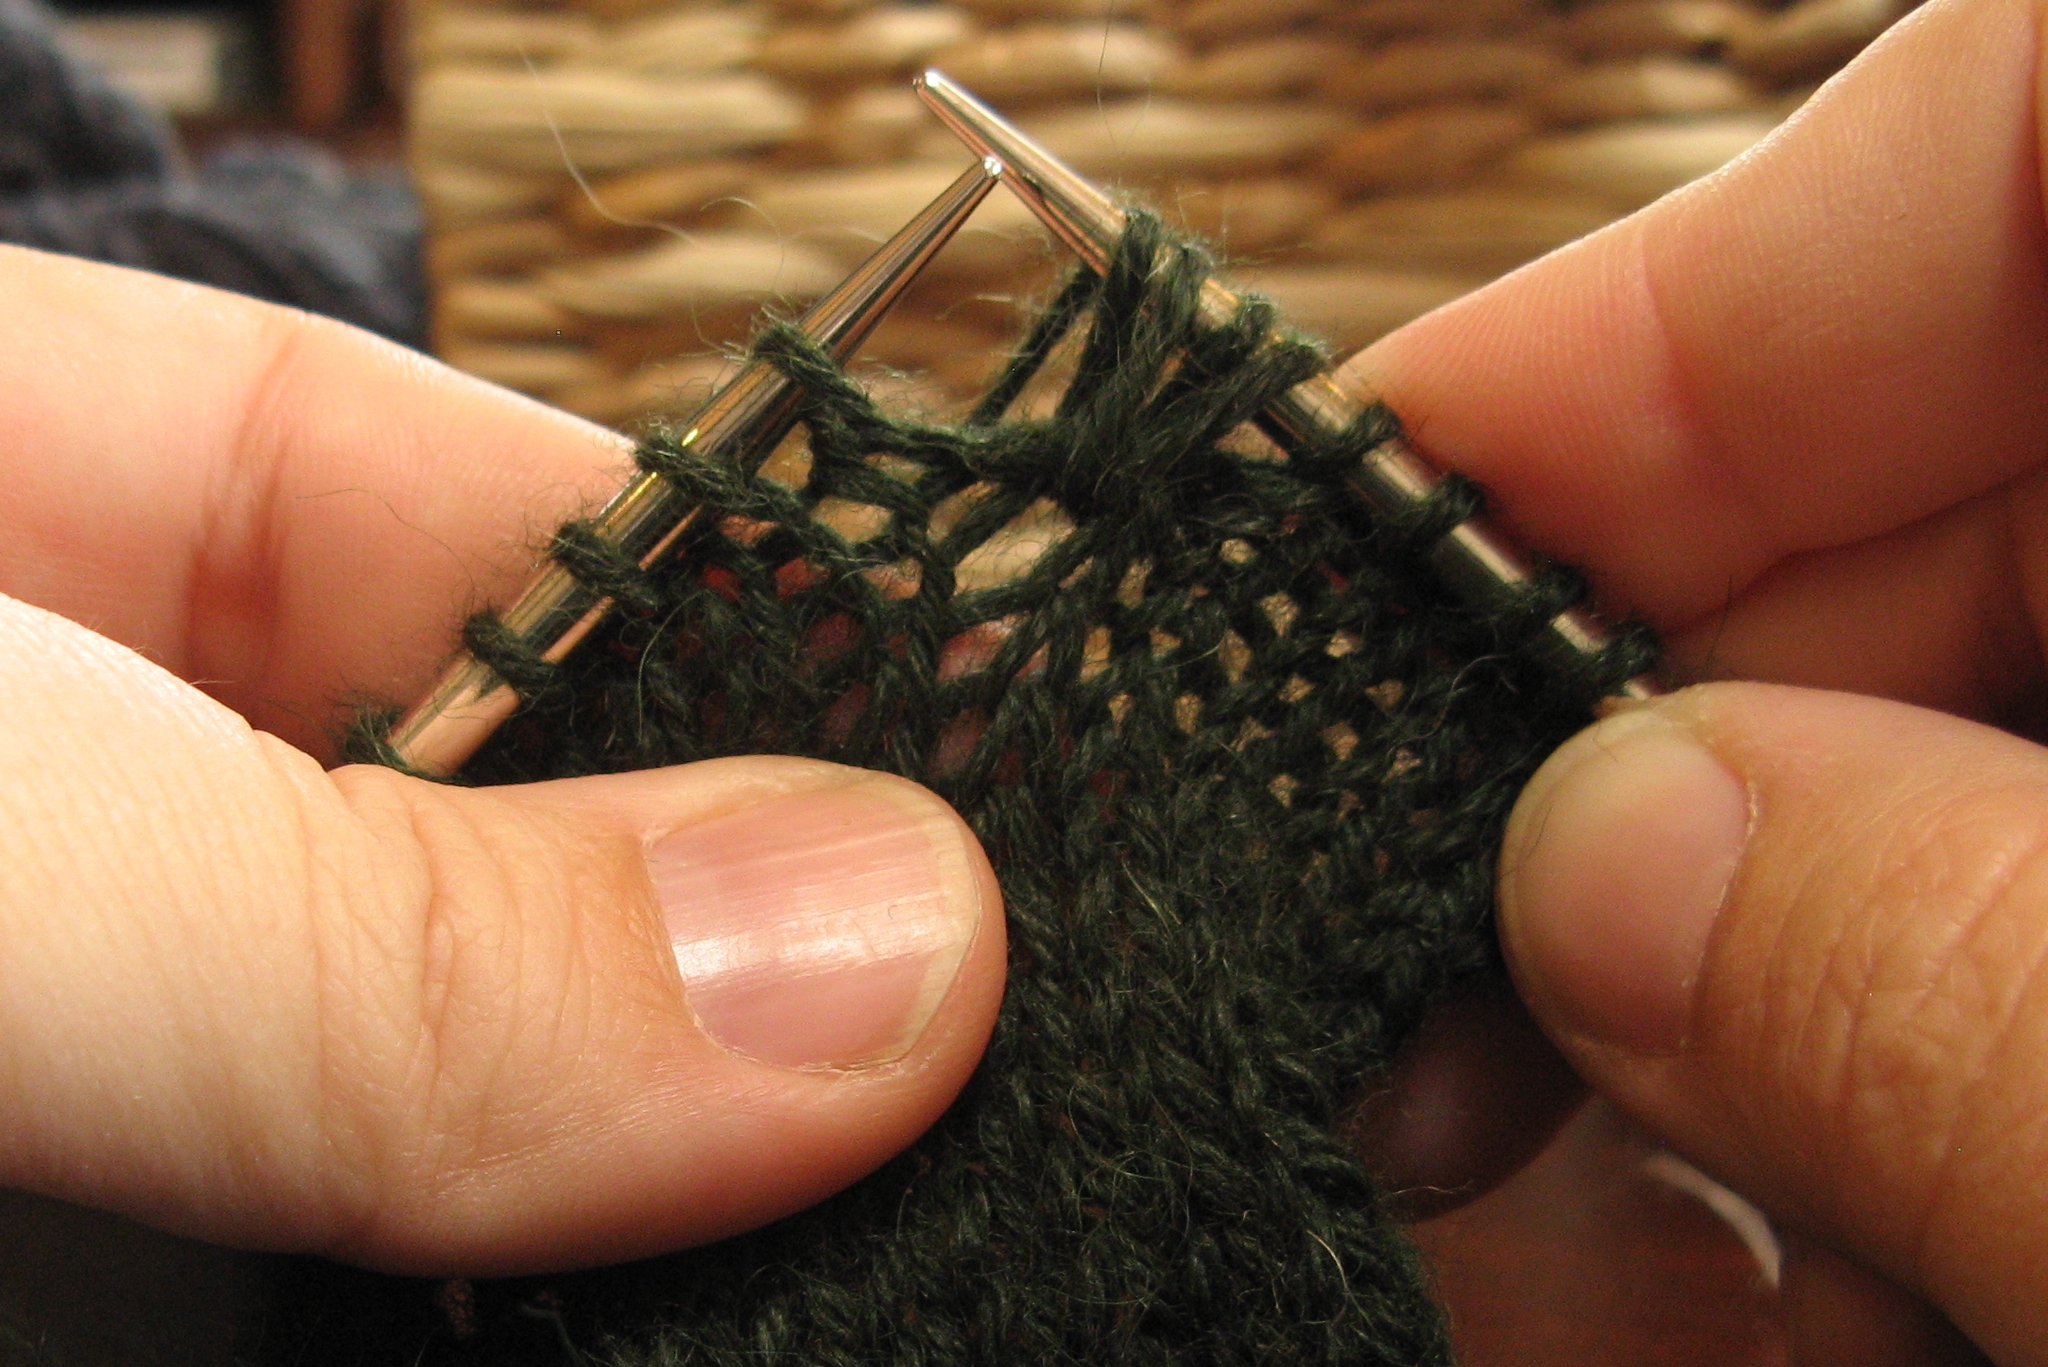
Step#1: Identify the target stitch, into which we will be working.  The first stitch on the left needle is “zero” — count down 1, 2, 3 holes. In this photo, the right needle is beginning to enter the target stitch.

IMG_7316

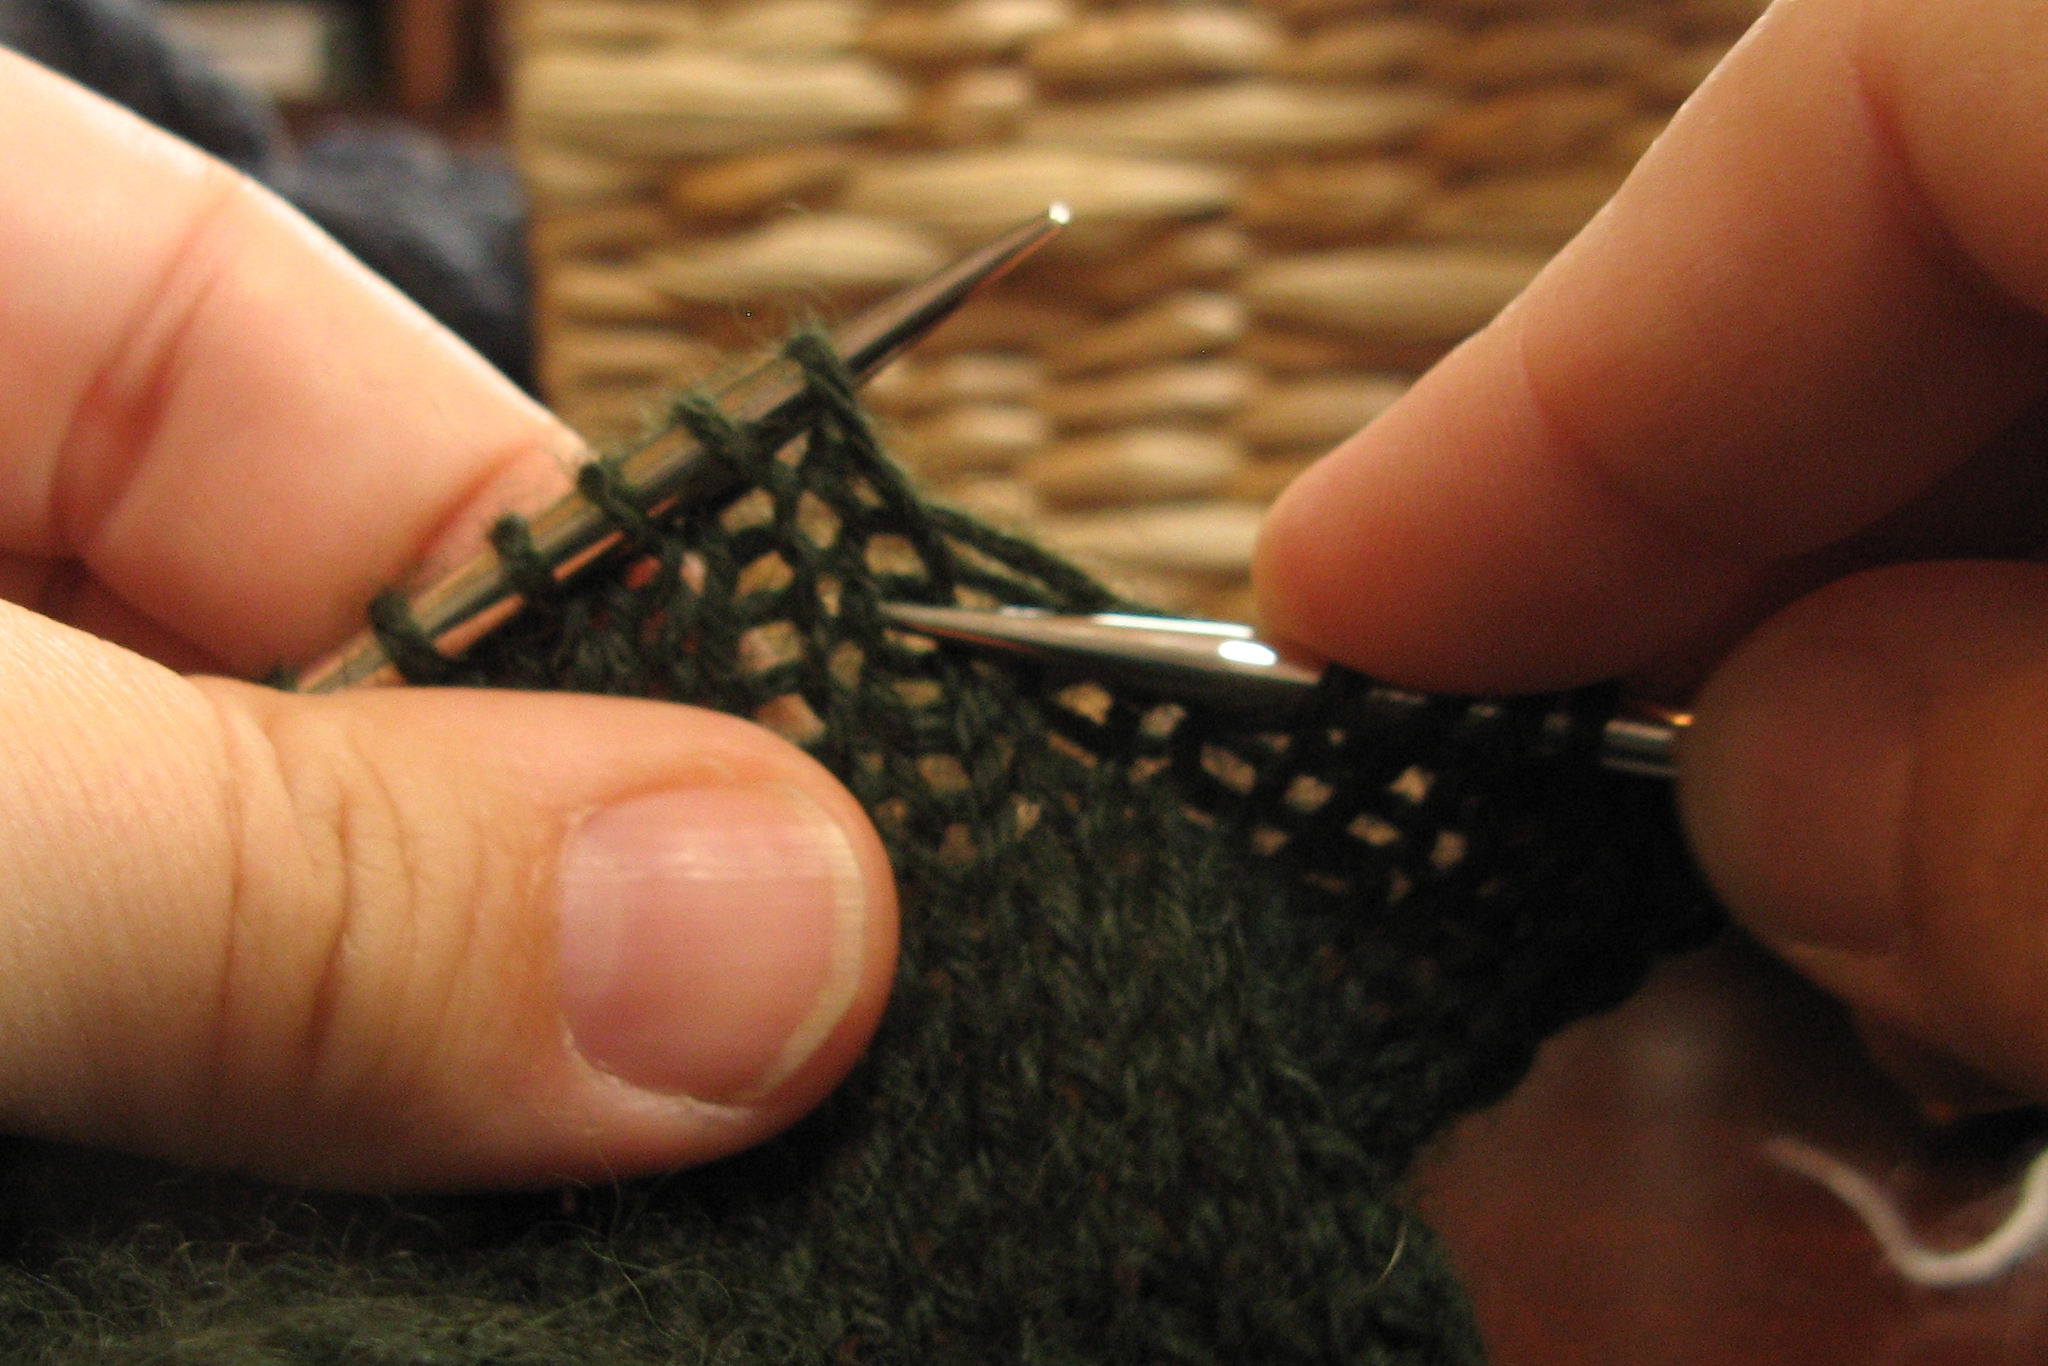
Step #2: Knit 1 through the target stitch

IMG_7325

Step #3: Yarn over

IMG_7327

Step #4: Knit 1, then yarn over

IMG_7330 IMG_7331

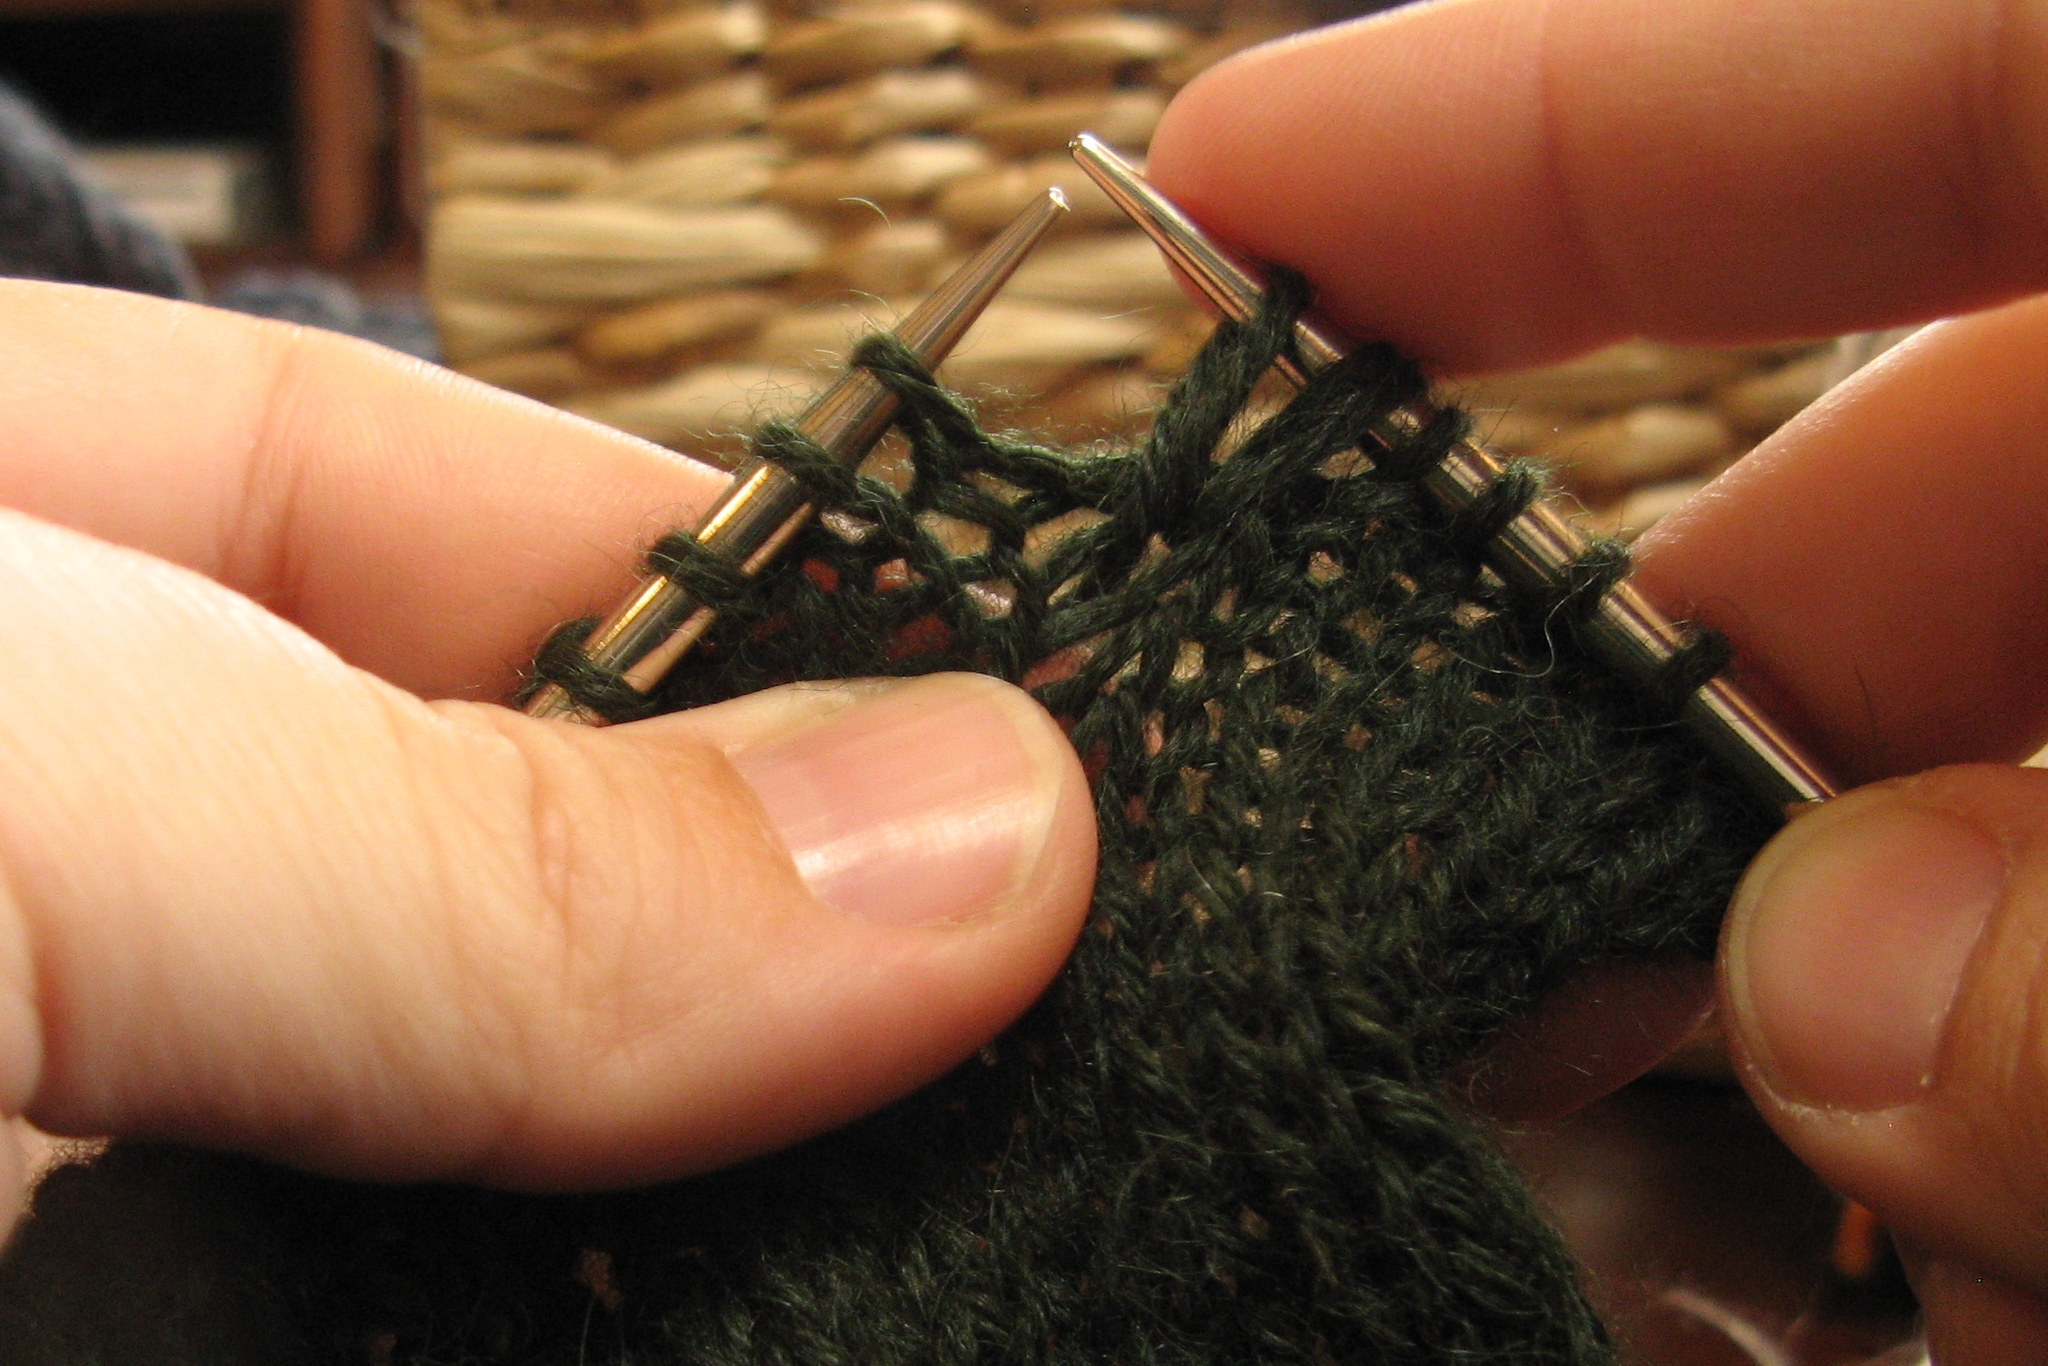
Step #5: Knit 1 (this is the fifth and final stitch made)

IMG_7336


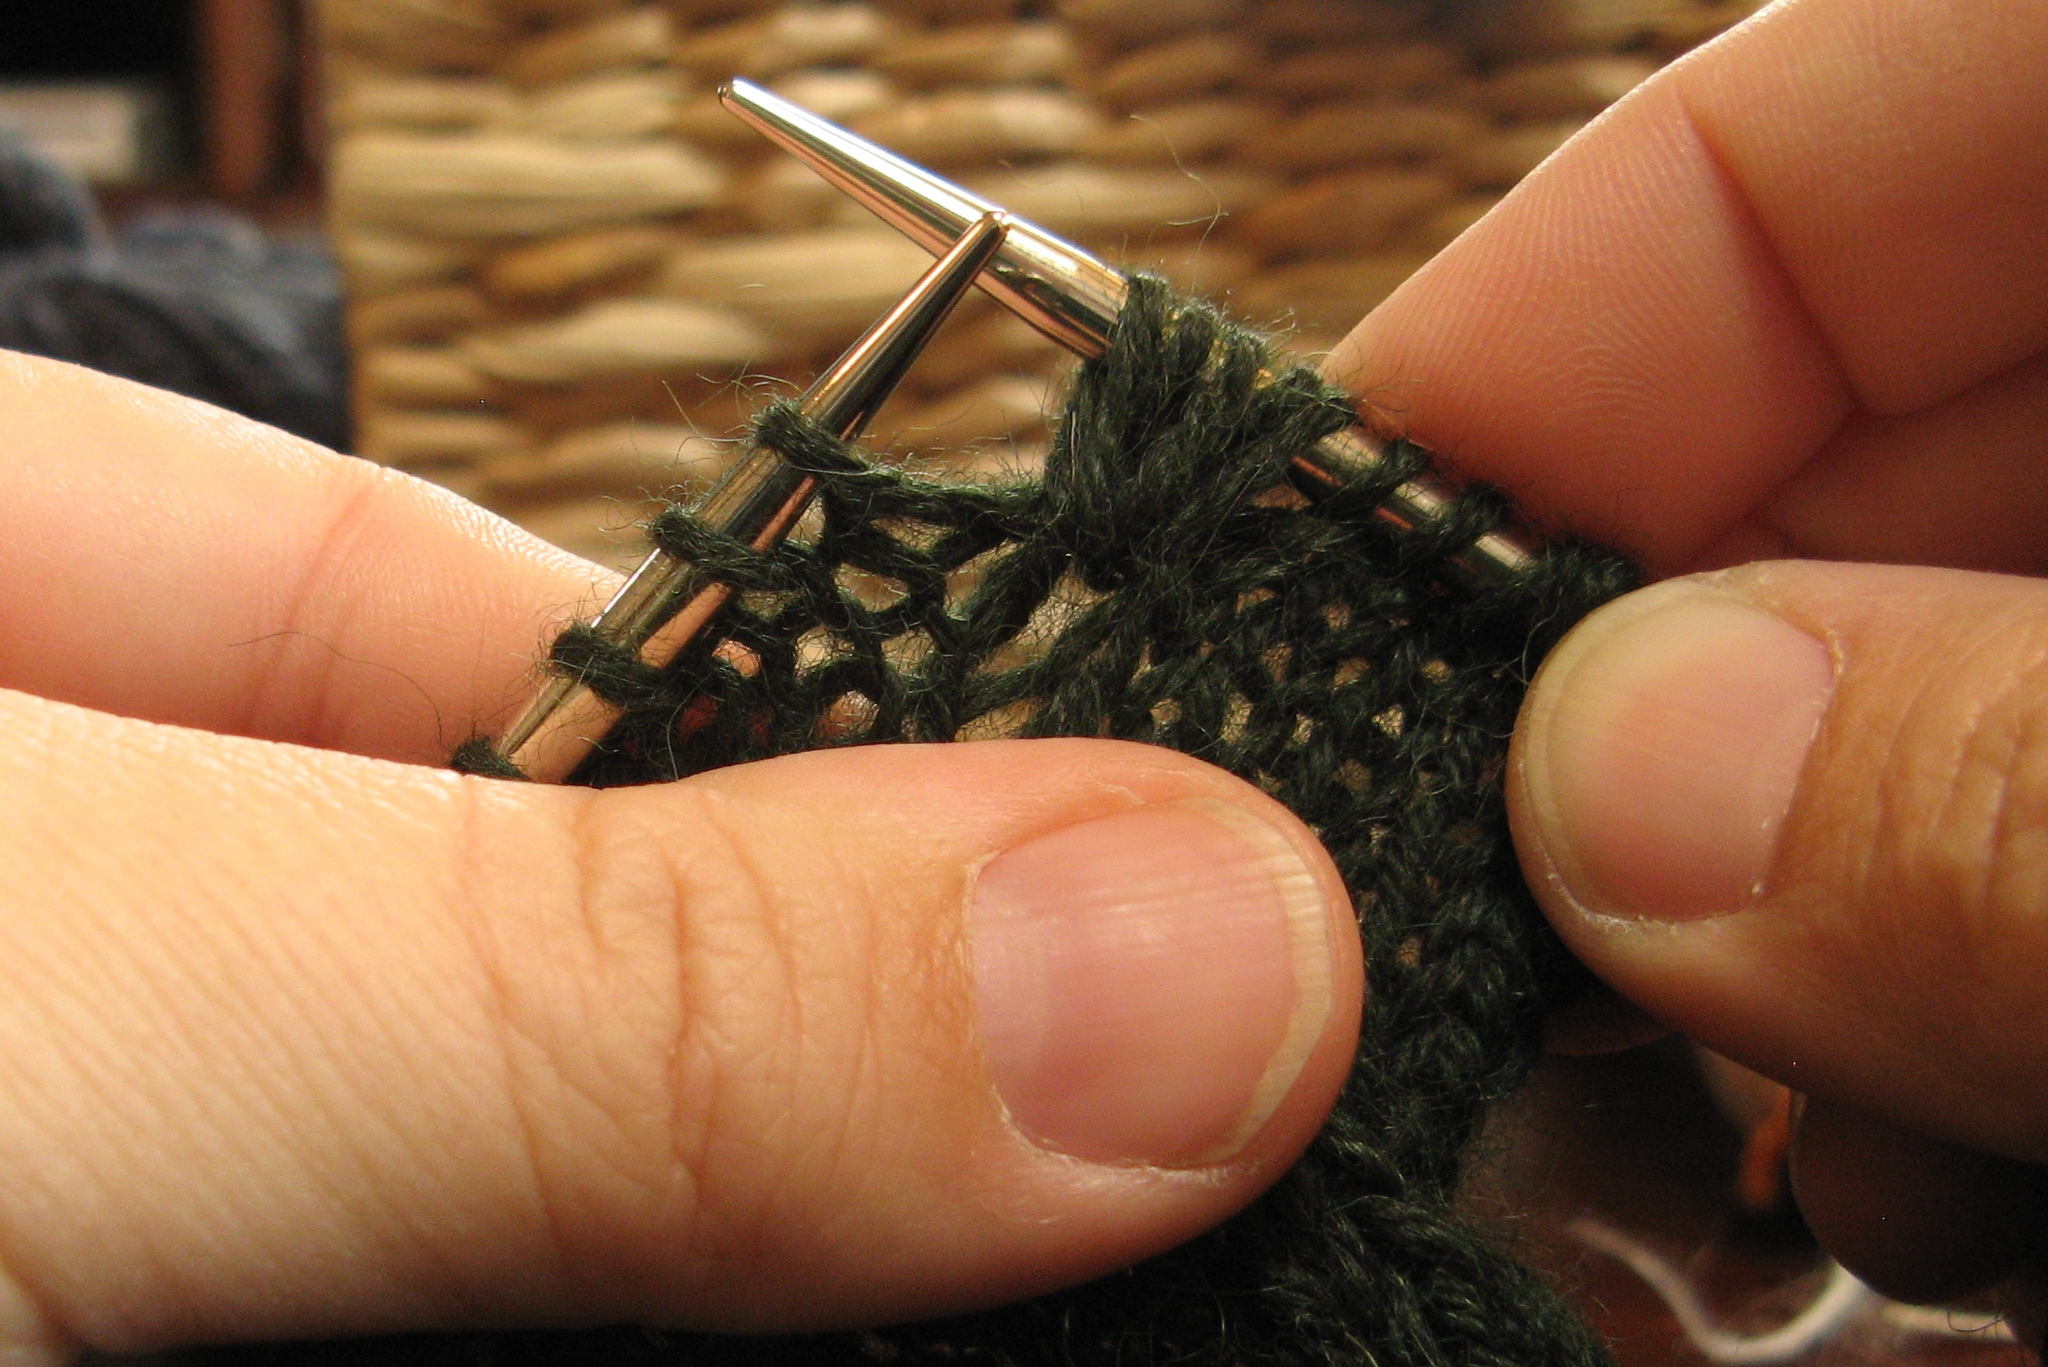
Step #6: Drop the first stitch off the left needle — allow 3 rows to ladder down (they are secured within the (k1, yo, k1, yo, k1)

IMG_7346 IMG_7347

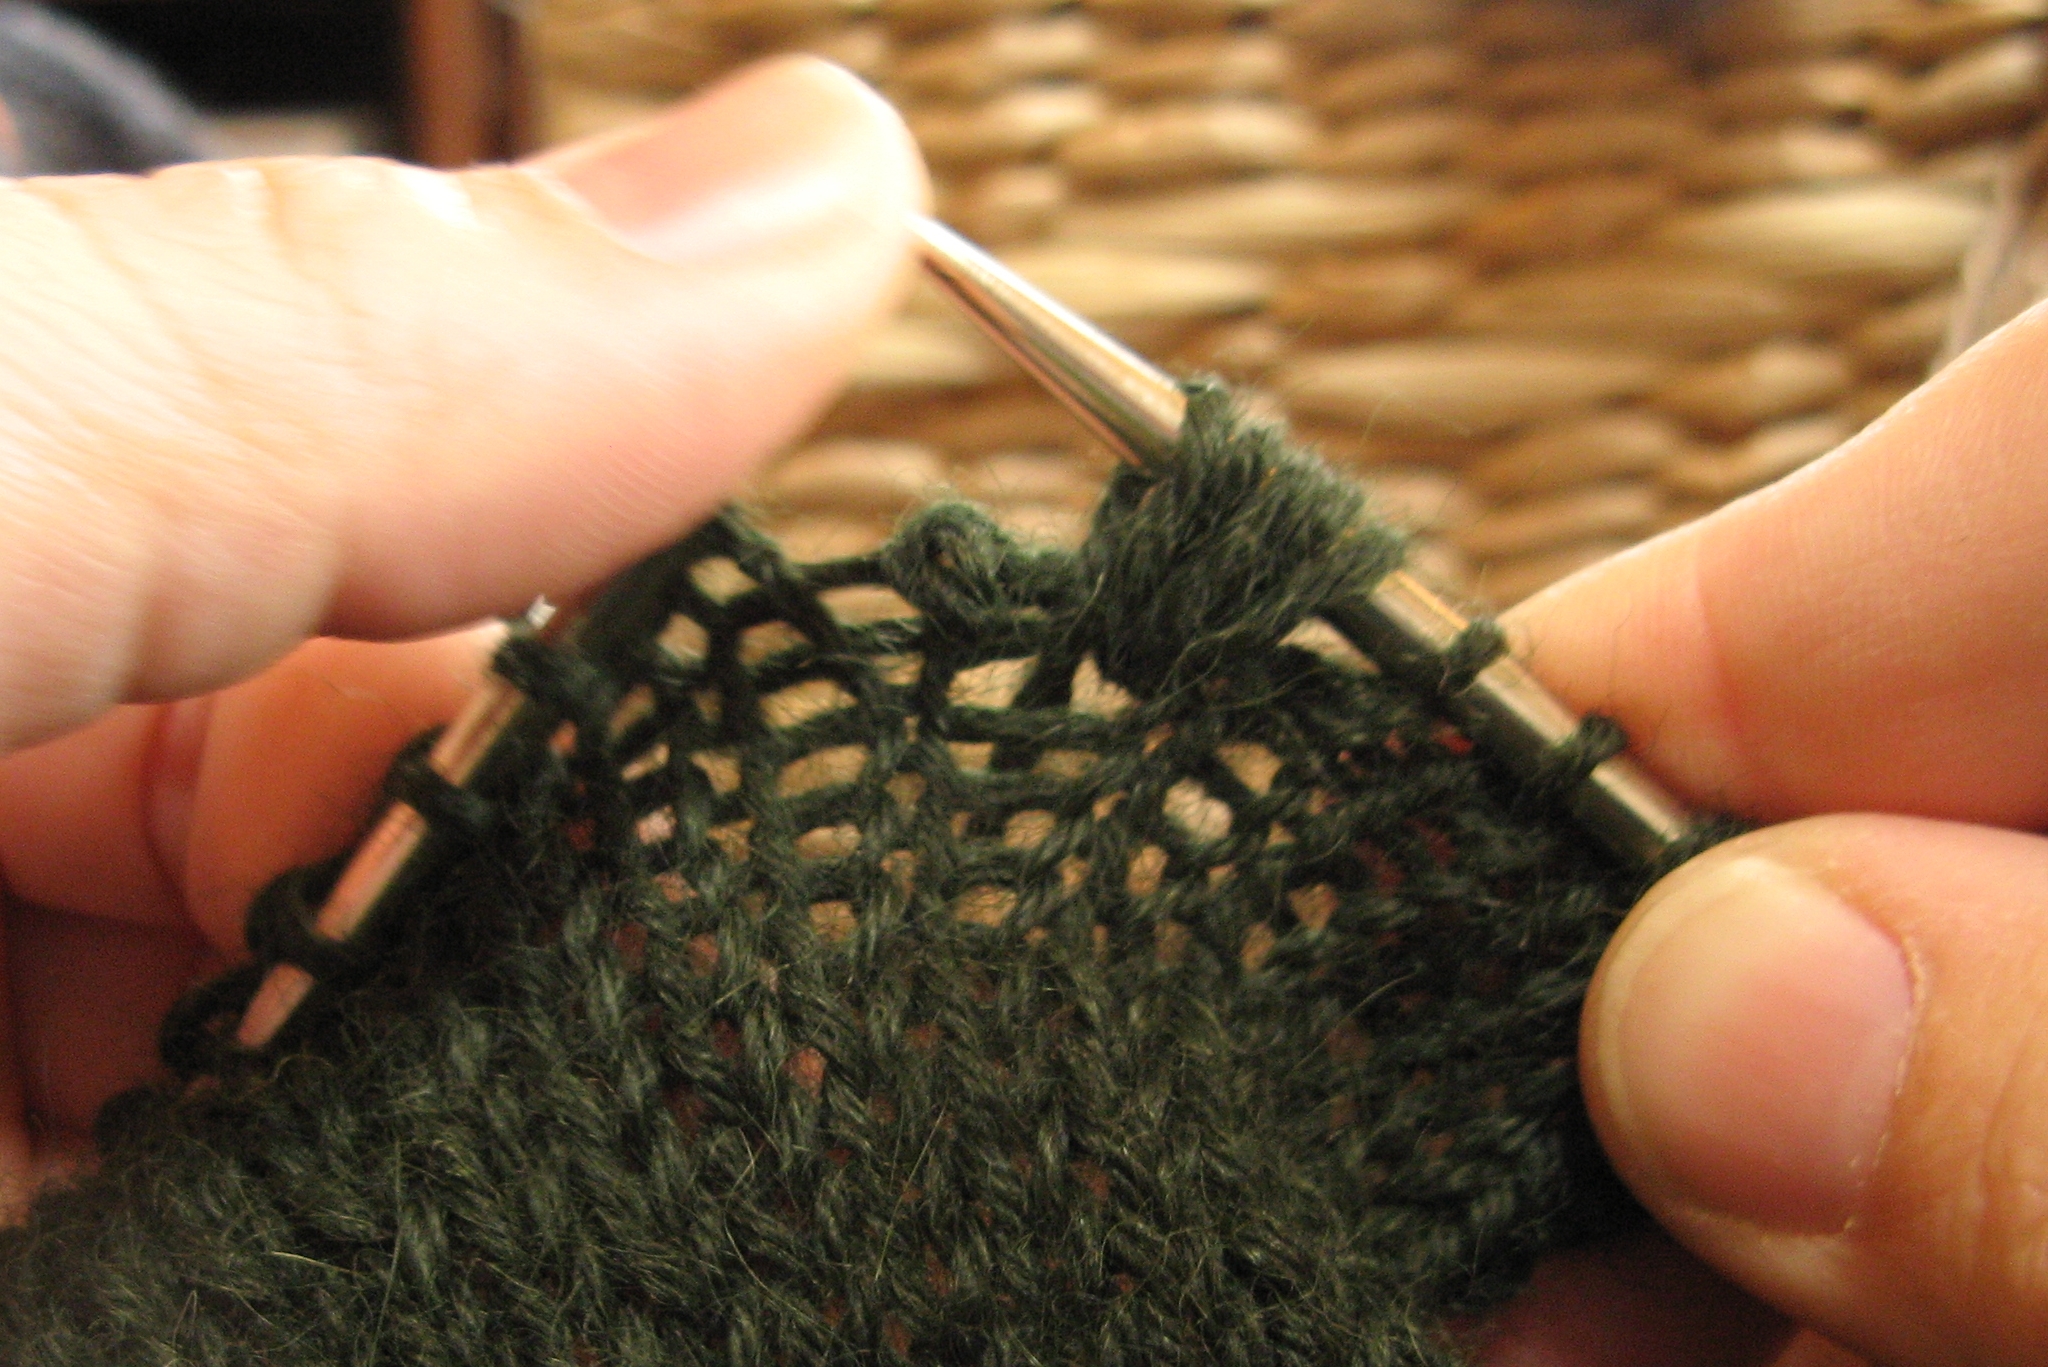
Step #7: M5-3b is complete!

IMG_7350


Advertisement

Tips and Tricks: Rodekool is Dutch for Lace Brioche

Back in February, I cast on for my very own Rodekool de Kool.  Designer Nancy Marchant published Rodekool in the Deep Fall 2010 issue of Knitty — it’s still available (for free!) there.  Keeping in mind that I’ve never done much (any?) brioche before tackling this “extraspicy” pattern, and also keeping in mind that this pattern involves not only brioche but also lace … it totally kicked my butt at first.

Getting through the set up rows and first few repeats of the lacy brioche pattern very nearly did me in. It took every last ounce of available mental prowess, kntterly skill, and concentration.  Thankfully, once I’d accomplished those first few rows … things began to settle in.  Here’s the RS and WS  just after the keyhole:

IMG_3550

So pretty, right?  For once I used the called-for yarn, and (by accident) selected the same colorway as the sample, so if my version looks a bit like the photographs in the pattern, that’s why.

IMG_3551

I’ve trucked right along on this project, but I find I can’t work on it at knitting group (chatting!) — at least not successfully.  But, working on it at knitting group did help me learn how to tink lace brioche!  Ugh.  I have also learned how to fix (small) mistakes, and also pick up the stitches after ripping out several rows.

I’m nearly done with my Rodekool de Kool, and I wanted to share how I’ve been doing it.  I’m not saying it’s totally right (though I believe it is) — naturally this is my interpretation of the pattern, and not endorsed by the designer or knitty, and so on. Usual caveats apply!  In editing I already noticed that I keep calling the big decrease a “quintuple” decrease when I should have say “quadruple.”  Oops. But, I also feel like I figured out a bit of a shortcut with the wrong-side rows — of course for all I know, brioche knitters already know my little trick, but just in case, I thought I’d share.

With all that, I’m sure you are dying to see what I’ve come up with.  I split the video into three parts.  First up: Row 1 (RS, MC)

Still with me? Here’s Row 1 (RS, CC):

The part that’s “mine” is next.  Row 2 is just straight-up brioche — no lace — and fairly early on I decided it must be possible to work the stitches in a single pass, rather than doing first the MC, then the CC.  Here’s my take on Row 2 (WS, MC & CC together):

I hope this was enjoyable and even useful! This is a great pattern with a lot to offer.

New Pattern Release: Steek This Coffee Cozy

Introducing my latest pattern: Steek This Coffee Cozy! I designed this button-up mini vest to fit 20-oz coffee cups. More important than a stylish accessory for your latte, however, is the opportunity to try out steeking!

2778 Steek This


Steeking is technique used to safely and securely cut your knitting to create holes where you want them. It is frequently used with complex colorwork sweaters, because it is easier and faster to knit colorwork in the round. It can be scary to steek a big sweater, so I created this scaled-down steeking project to help knitters try out the technique fearlessly. The cozy is worked in the round with stranded colorwork to create a classic fair-isle pattern. Then follow the step-by-step guide to steeking with a crocheted reinforcement.

2779 Steek This

Pattern: Steek This Coffee Cozy

Designer: Rachel Henry (that’s me!)

Available:  FREE! on Ravelry

Yarn: Cascade 220 Solids and Heathers

2775 Steek This

2776 Steek This

Inspiration: This coffee cozy popped into my head when I was thinking about fun, useful classes that I wanted to teach. If we get enough people, I’ll be teaching “Steek This” on Mondays this September at Unforgettable Yarns.

Yarn: Natural fibers, NOT superwash

Design/Skills Needed: This project is best for knitters who have experience with colorwork and knitting in the round.  The tutorial walks you through the process of reinforcing the steek with a crocheted chain before cutting. Stitches are picked up along the two edges created by cutting, and the button bands are knit from there.

2755 Steek This

I would be delighted to answer any questions or help any knitters working on this project.